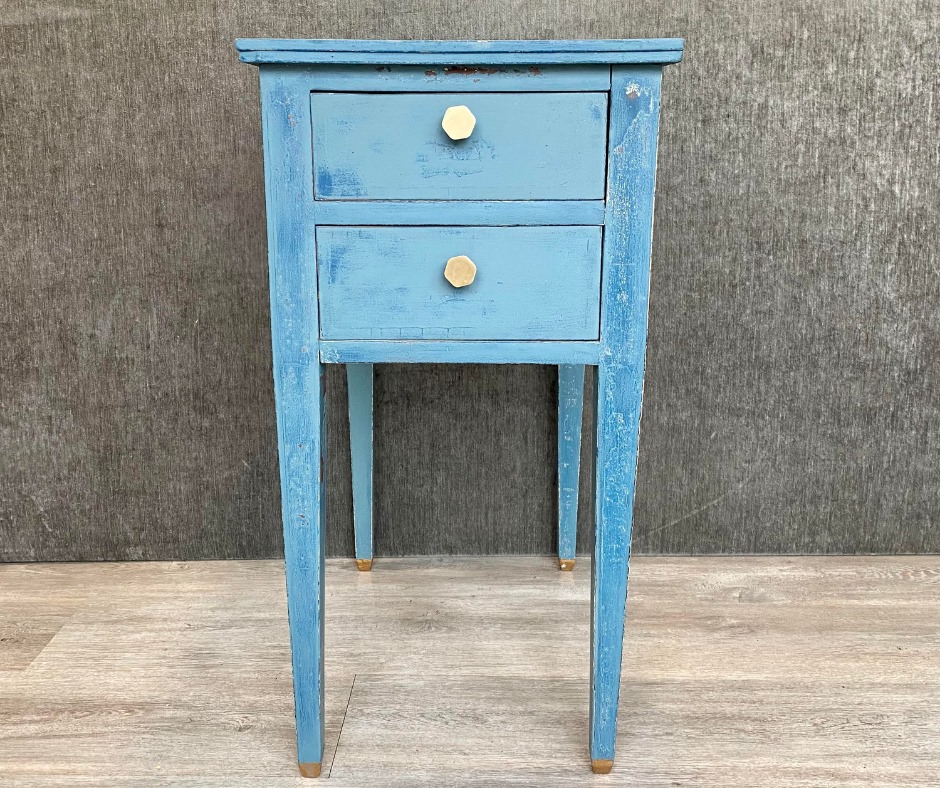
Milk Paint by Fusion bedside table
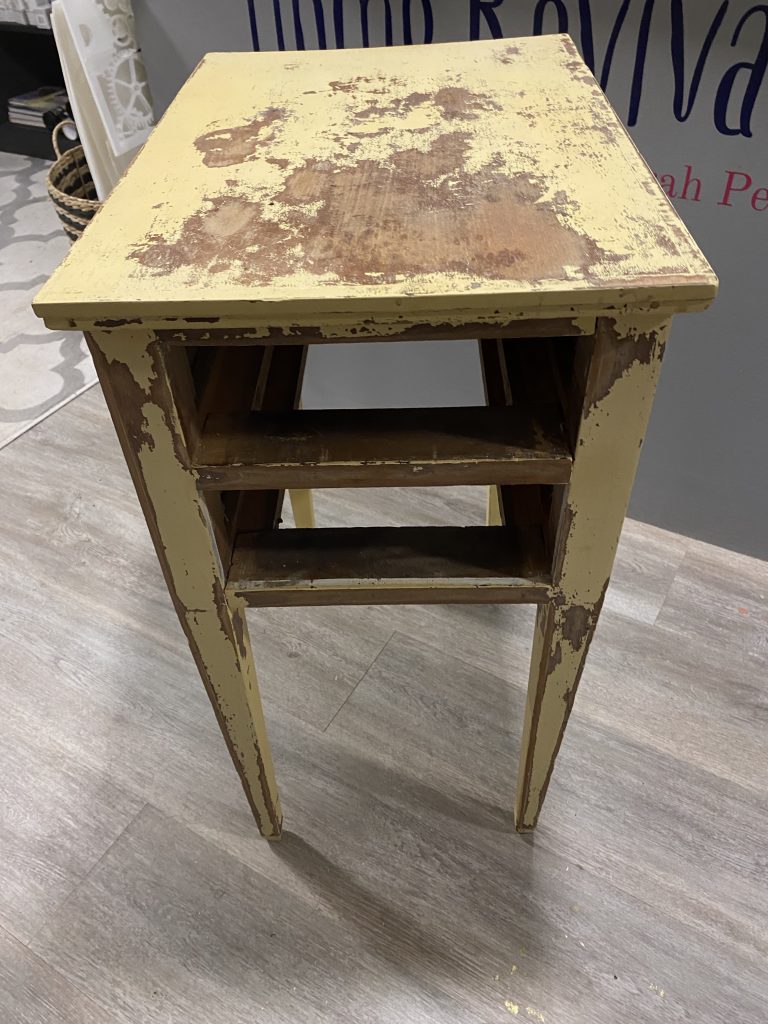
This old bedside table had once started life as a desk! The desk was damaged beyond repair and so was chopped up. It already had been painted in Milk Paint so when the new Milk Paint by Fusion arrived in the shop I wanted to use some of the new colours.
Prep for Milk Paint
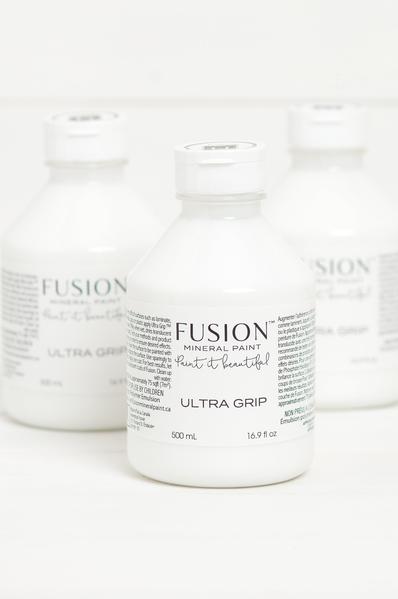
Prepping for Milk Paint is similar to prepping with Fusion.. Except there is the chance of Milk Paint ‘chipping’ So what do you do if you don’t want chipping and you just want a smooth modern finish? No problem you just add Bonding agent ( Ultra Grip ) into your mixed Milk Paint after you have cleaned well with TSP and scuffed sanded. Wondering what the difference is between Milk Paint and Fusion? See my previous post here.
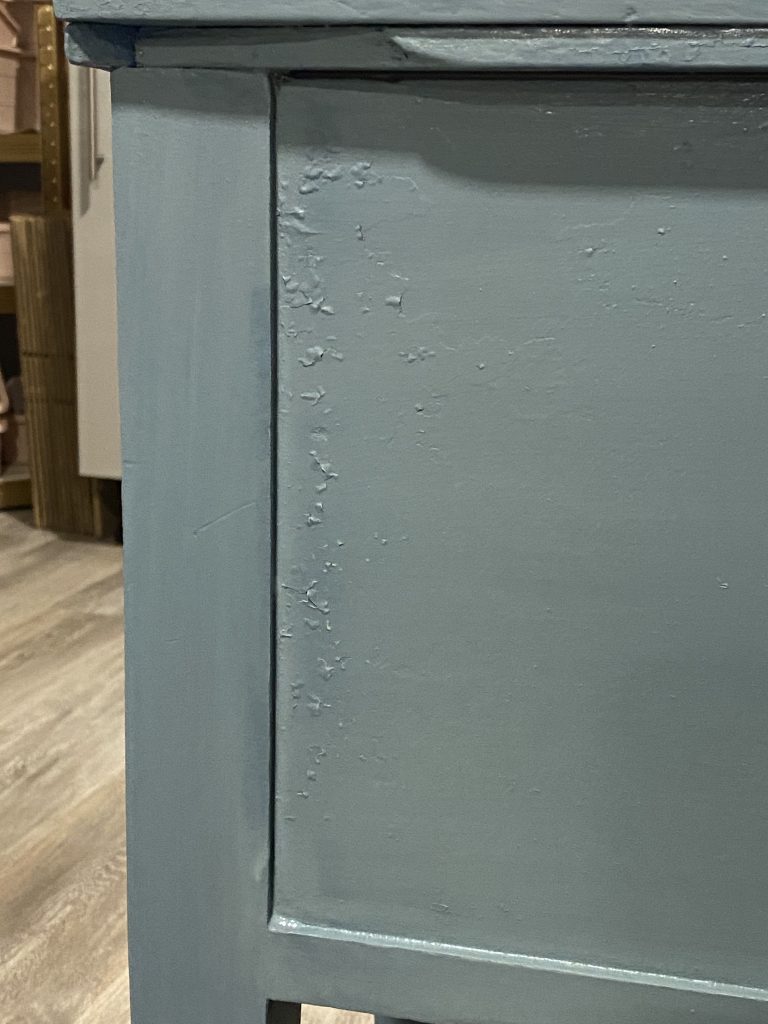
Getting Milk Paint to Chip
If you don’t mind chipping or you want it , just clean and paint. If you surface has a finish on it like varnish or lacquer the chances are it will resist those areas and you’ll get some chipping. This is the kicker! You don’t know if you will get some or not, it may resist everywhere or nowhere. So you have to be ok with that.

With that being said the more you Milk Paint the more you get a feel for what will and what won’t chip. If you don’t want any chipping just add Bonding Agent to your first coat after proper prep. No chips! The other way to guarantee no chipping is to use it on raw wood. It soaks in and binds with the wood fibers almost like a stain so no chipping at all!

Prepping the bedside
I don’t mind chipping and as this bedside already had some so I just sanded off all the loose Milk Paint. Word of warning, this stuff is tough! Normal paint stripper won’t touch it so sanding really is your easiest option. After sanding I filled the holes from the old hardware
Layering Milk Paint
As Milk Paint is just powder mixed with water it is thinner than regular paint. There are a few bonuses to this, 1 it leaves zero brushstrokes, I mean you can put this on with a sweeping brush and still not get any brushstrokes! OK I may be overstating but it really is almost impossible.
The other added bonus is because it is so thin you can layer multiple coats of paint without the build-up you would get using regular paint. This makes it great for those 2 toned or even 3 toned layered looks. An authentic aged look of being painted many times over its life. It’s not for everyone but it can look delicious on the right piece.
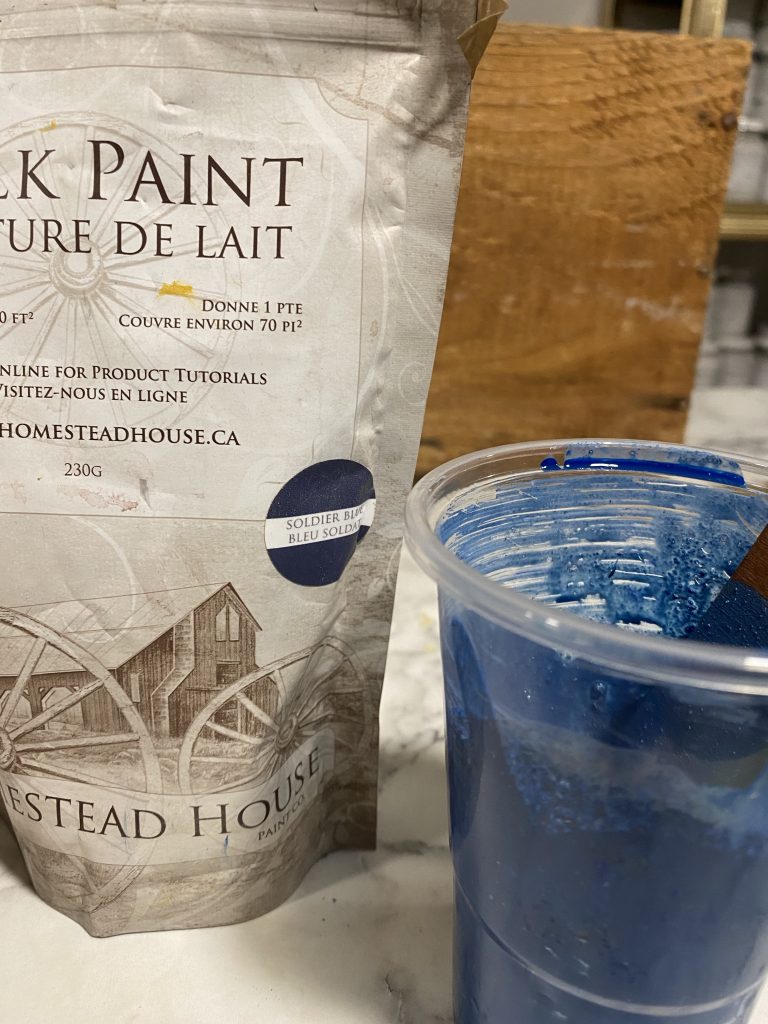
Homestead House Milk Paint -Solider Blue
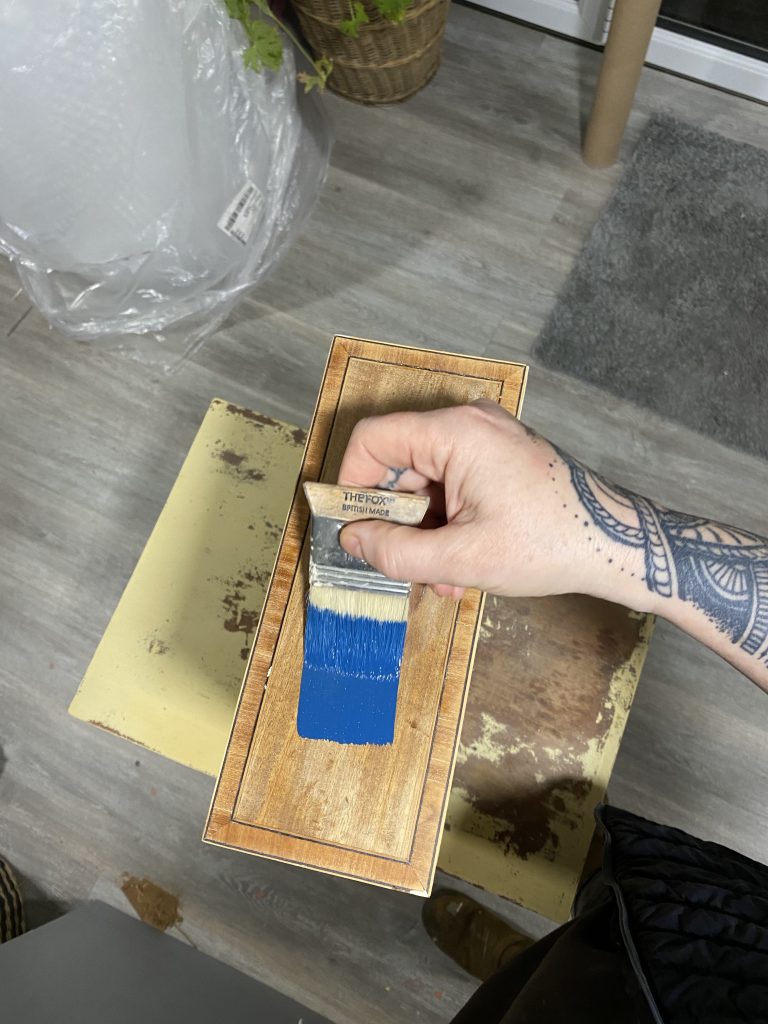
Homestead House has manufactured Milk Paint for decades! In fact, it manufactures Miss Mustard Seed Milk Paint, Milk Paint by Fusion as well as having a huge range of colours in their own line. You should check them out here. I used Solider Blue for the base coat, it is a beautiful bold almost royal blue.
I applied one coat all over the bedside and allowed it to dry. Did you know Milk Paint only takes approx 30 to cure! not just dry, cure! another bonus to using Milk Paint.
Milk Paint by Fusion
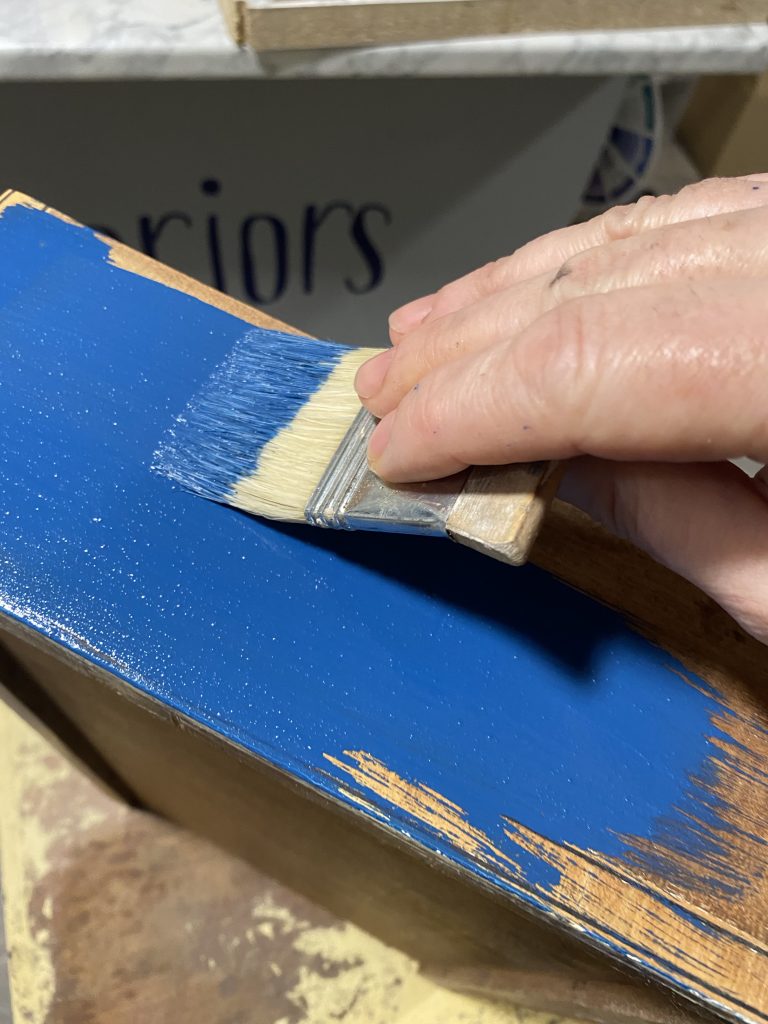
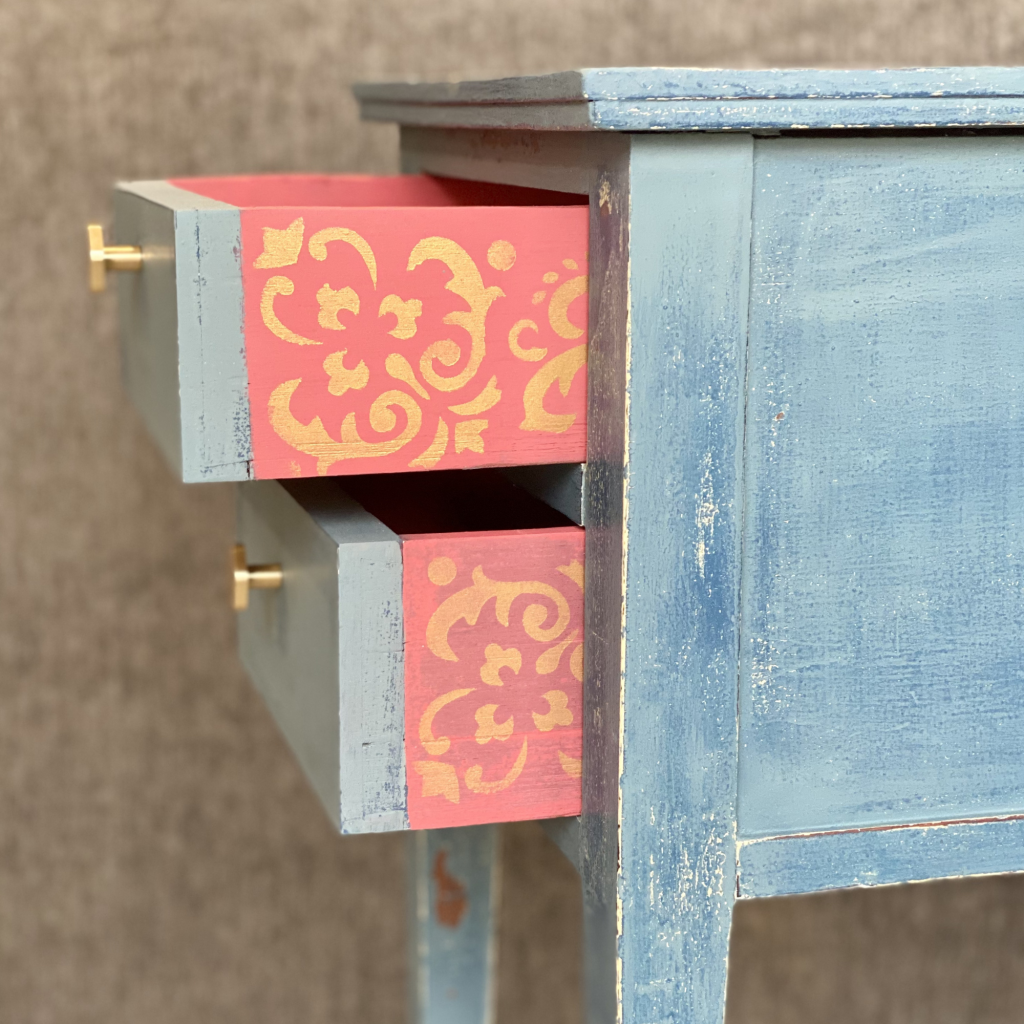
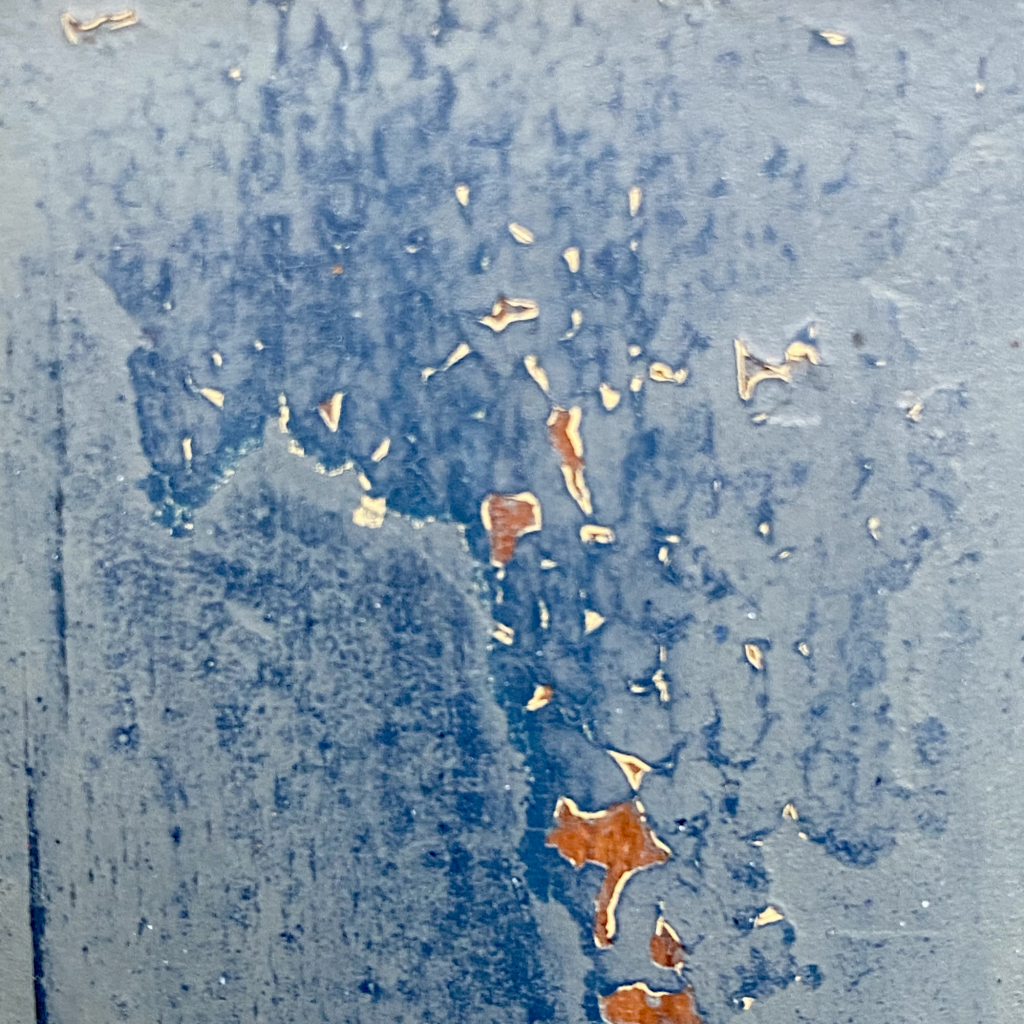
Monterey from the new Milk Paint by Fusion line was the colour I choose to layer over top of Solider Blue. It has an almost grey green stormy seas sorta vibe to it. You must know I love green by now!😜 Just one coat as I wanted to sand through the layer almost leaving just a hint of the colour behind.
This is one of my favourite picture of some stormy seas in Port Issac in Cornwall and this colour reminds me of it.

I did get a little chipping and I was ok with that. I could have prevented this had I wanted to by adding Ultra Grip to the mixed Milk Paint.
Finishing touches
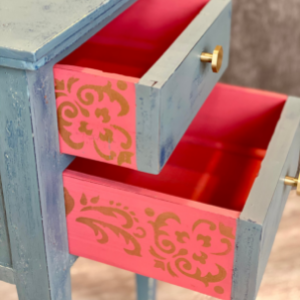
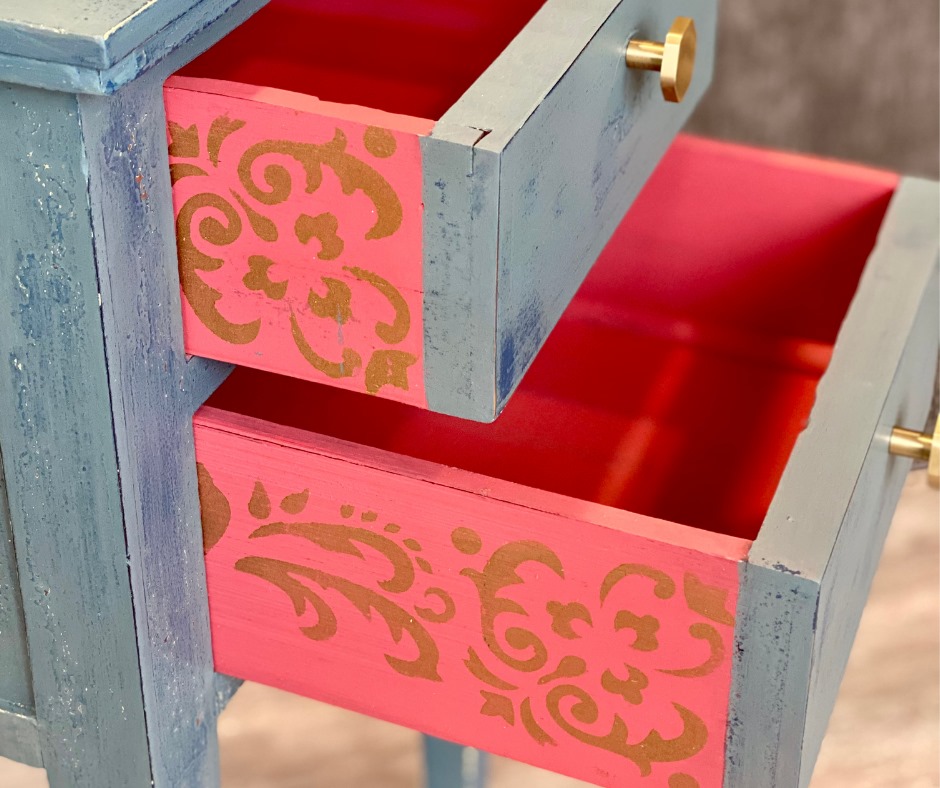
The drawers got a little peekaboo pop of colour with Hawaiian Hibiscus a beautiful coral/red. I also used one of the stencils from the Posh Chalk range, this one is called Woodubends they have over 30 designs from A4 to floor and wall sizes and if you haven’t seen them yet you are missing out!

The stencil design was painted with Posh Chalk pigments and Whitson’s Lacquer. The lacquer has a beautiful semi-gloss sheen which keeps the pigments bright and metallic. I used 2 different coloured pigments the Pale Gold and Orange Gold mixed to make a brassy tone.
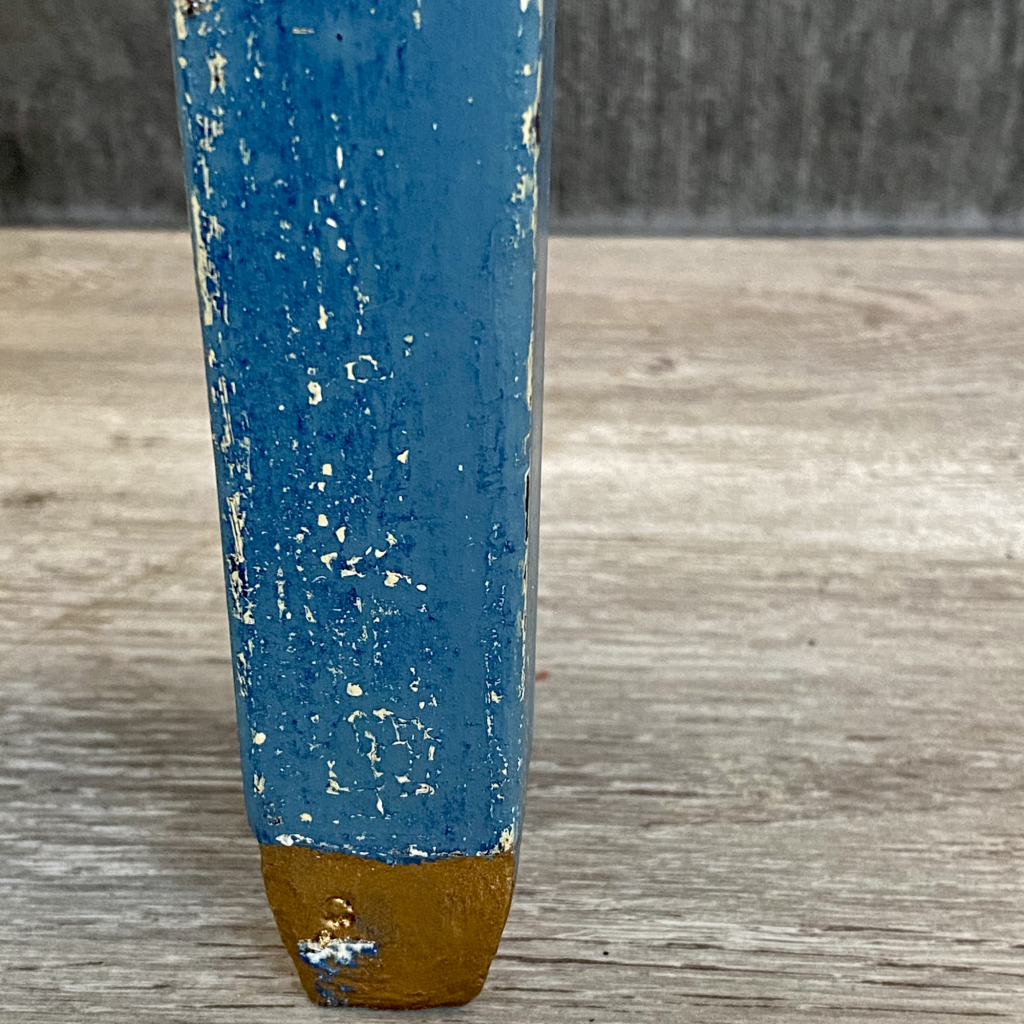
Hemp Oil sanding
Milk Paint has to be sealed, it can be sealed with your favourite top coat or you can use wax, Tough Coat, Hemp Oil, or even Stain & Finishing Oil. My favourite is Hemp Oil, I just love the feel of the finish. Milk Paint is cool to the touch and very tactile when finished with Hemp Oil.
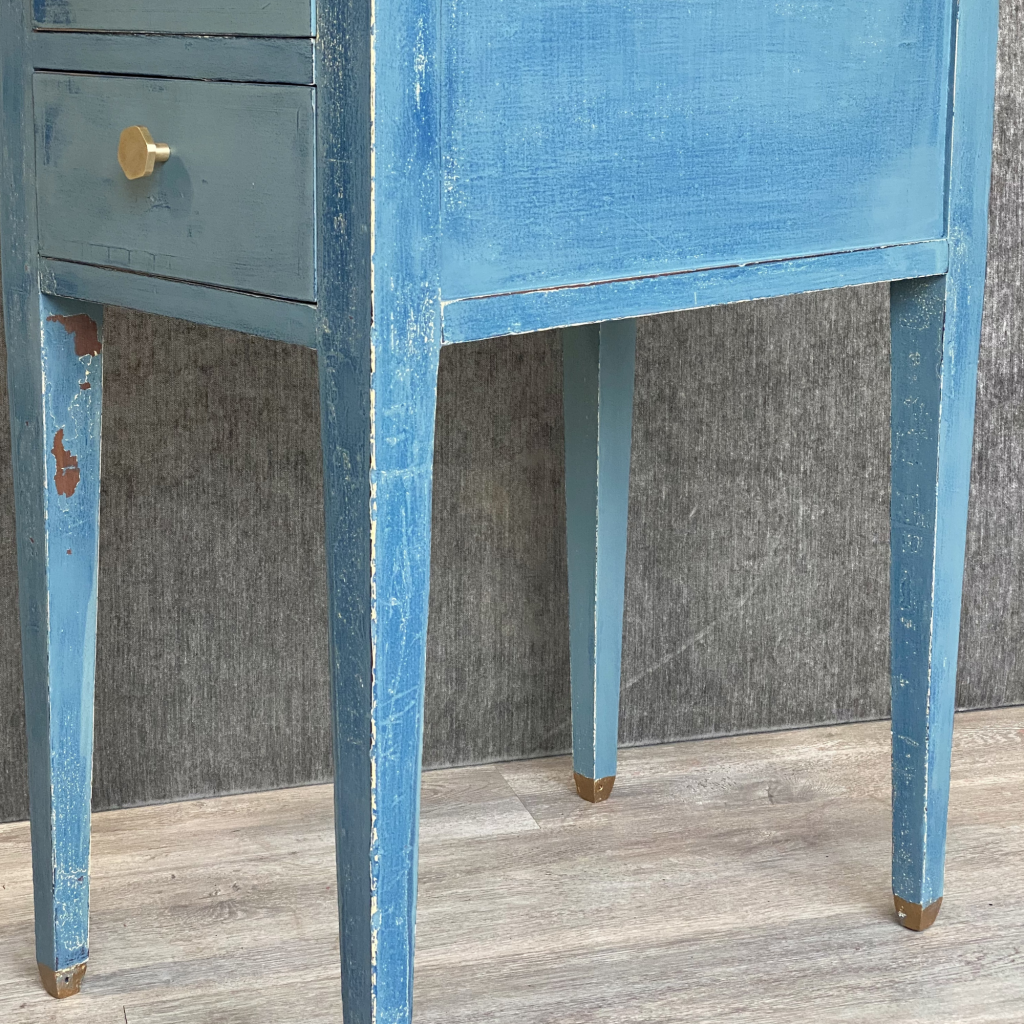
I applied the Hemp Oil and using a soft sanding sponge I sanded the piece all over gently. It revealed the base coat of Solider Blue and in some spots the original paint colour. I added some new drawer knobs and buffed the piece all over for the smoothest feeling finish and a subtle lustre.
Ao what do you think? Is the Chippy Look for you? Or would you like to see a smooth flawless finish next time? Leave a comment and let me know 🙂


One Comment
Comments are closed.