Dry brushing and glazing The Beast.
Dry brushing and glazing The Beast.
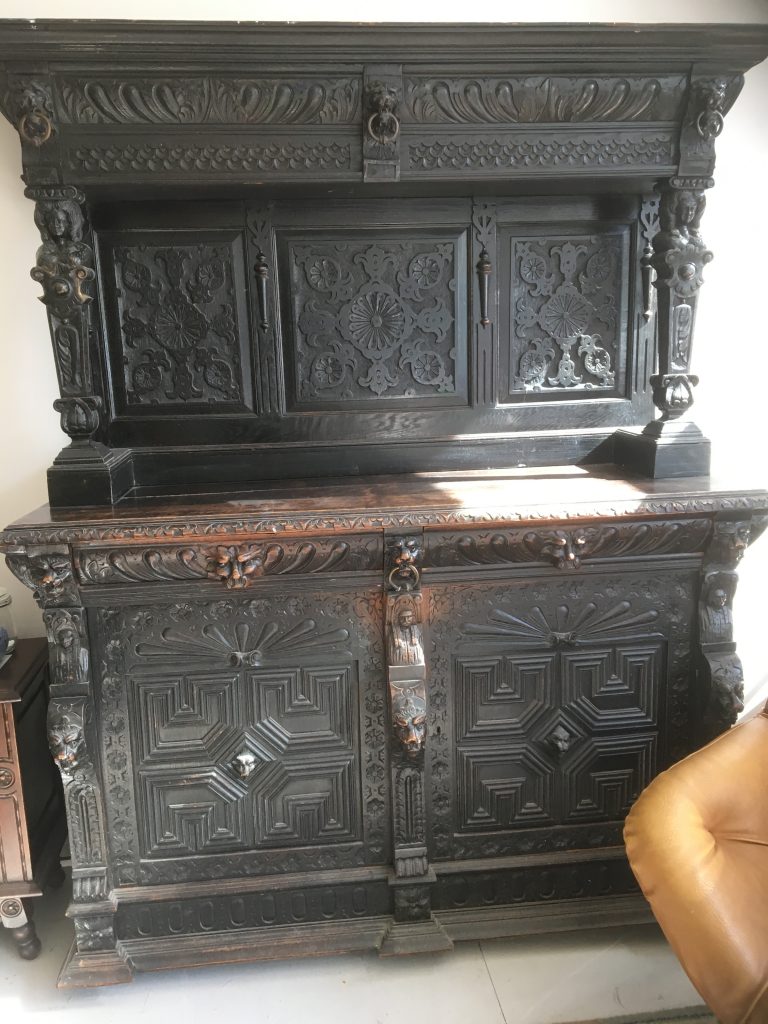
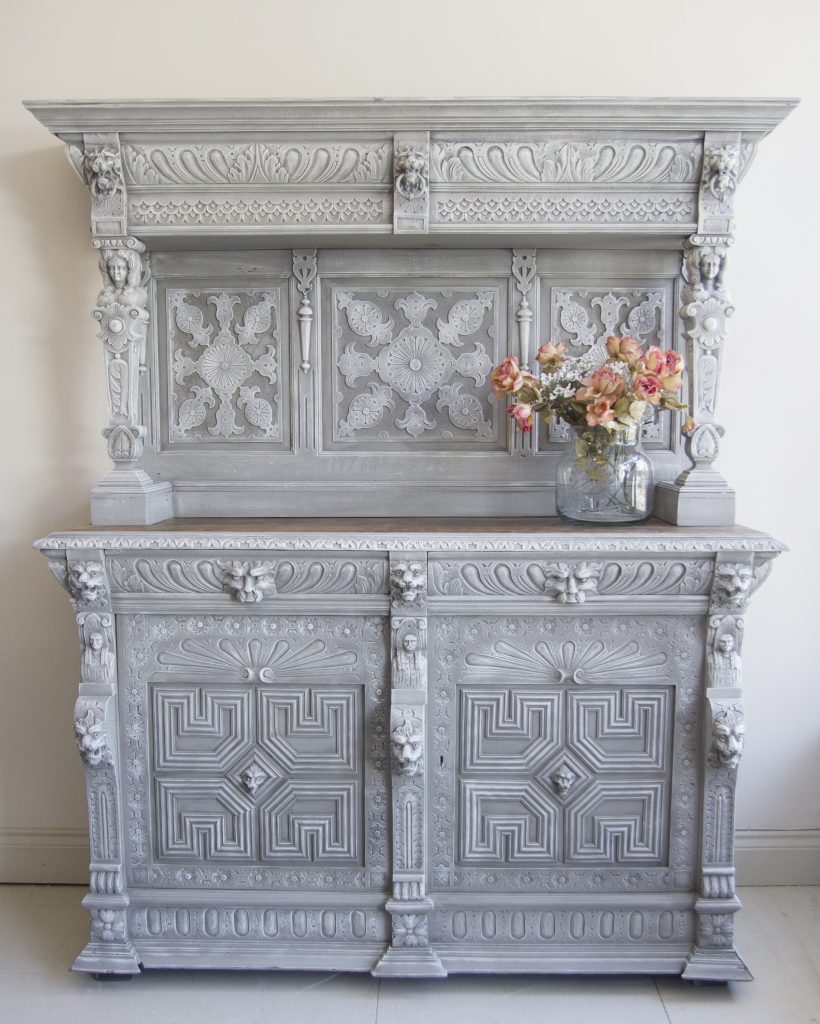
Our furniture supplier is a frequent visitor to France and has been trading for over 25 years, he often brings us back glorious gems from the land of garlic and lavender, this piece, however, wasn’t one of them. When it arrived it was dark, ugly and large, it’s a heavily carved oak and did I mention it was dark?
The creative process.
Now I’m gonna let you in on a secret, a trade secret, a massive secret. A secret so secret that all pro furniture finishers up and down the land will be mad that I am divulging this precious info! Right, are you ready? Once we get the pieces in and they are put in the workshop they sit there and we stare at them ….alot! Ha, I’d like to tell you I’m joking but it’s true! Now the reason we stare at them is… we are waiting for them to talk to us, they tell us what colour they would look best in, or if they should be stripped or ….you get the picture right?….. what’s that you say? we are all mad! I know it sounds more than a little strange but it’s true. Can I get an Amen from my fellow Fusionista sister’s?
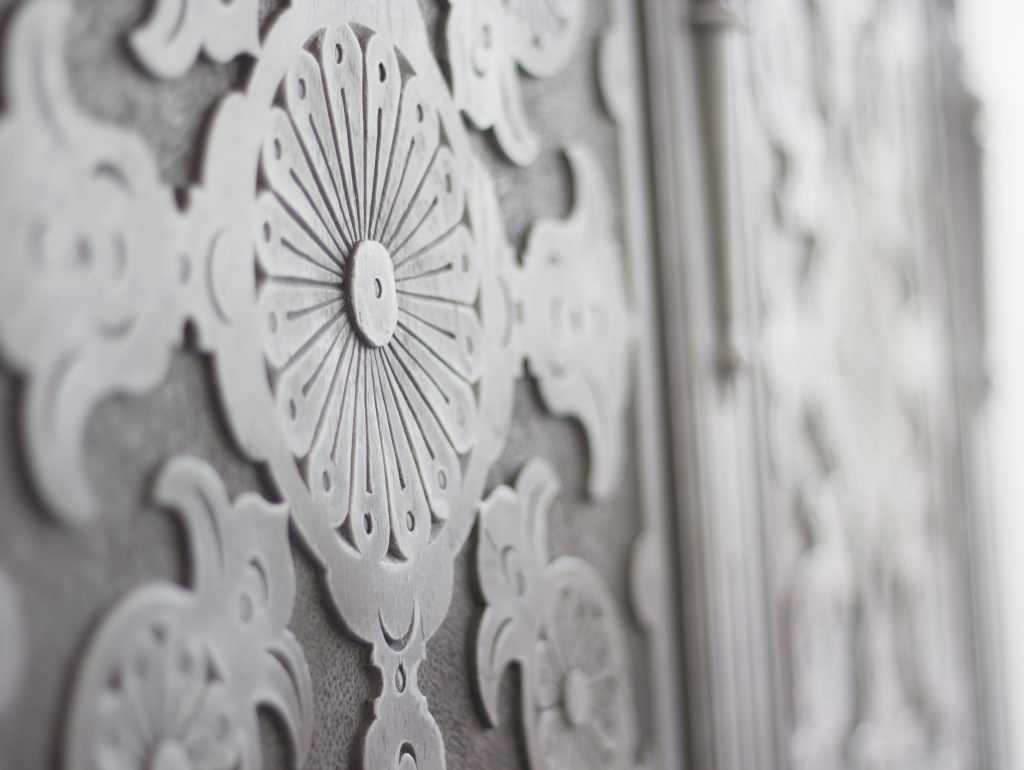
So I stared and stared and it said nothing! I showed it to customers, I trawled Pinterest, Google you name it! I eventually asked our Fusion stockists in the U.K for some help and one of the talented furniture painter Rebecca suggested a glazed look. I knew I didn’t want a block colour, it’s too big but a glaze and dry brush might work! So I choose Little Lamb from Fusion’s Tones for Tots range and got started!

Prep
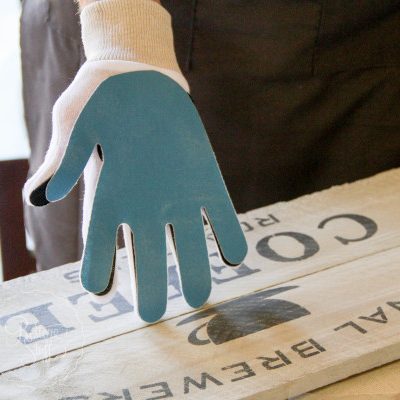
Now I know we have been lead to believe its a dirty word, but trust me on this ( I’m a Pro ) your paint finish is only as good as the surface you are putting it on. Now before you turn the computer off and walk out the door hear me out! Prepping your piece needn’t be the end of the world, each piece you work will need different levels of prep. The Beast was shiny so I knew it needed some prep for the paint finish to be durable, I started with a good cleaning I used soap and warm water and when it was dry, lightly sanded the flat areas using our fabulous Sandi Hands sanding glove now because of all the intricate carvings I wouldn’t be able to sand in those areas I used Fusion’s Ultra Grip. To find out more about Ultra Grip click here

I sprayed the entire cabinet with the Ultra grip to save time and guarantee a nice even thin coat, I let it dry over night and sprayed one coat of the Little Lamb, the coverage was excellent and because I knew I would be black glazing it, a second coat was unnecessary.The glaze was made using Fusion’s clear glaze and some Coal black to tint it. This was left again overnight and I decided I would spray the glaze on it as well! I have never sprayed a glaze before but as the detail on it was vast I thought it would be easier to spray into the nooks and crannies than to scrub the brush into all those areas and I was right! it worked a treat and I will definitely use this method again.
I Instagram storied ( Is that a word?) this entire process, if you are on Instagram pop over and check our stories out, you get the inside scoop of the day to day in the workshop. We also did a Facebook LIVE in the Facebook group How to Paint Like A PRO you can see that here.
The finish.
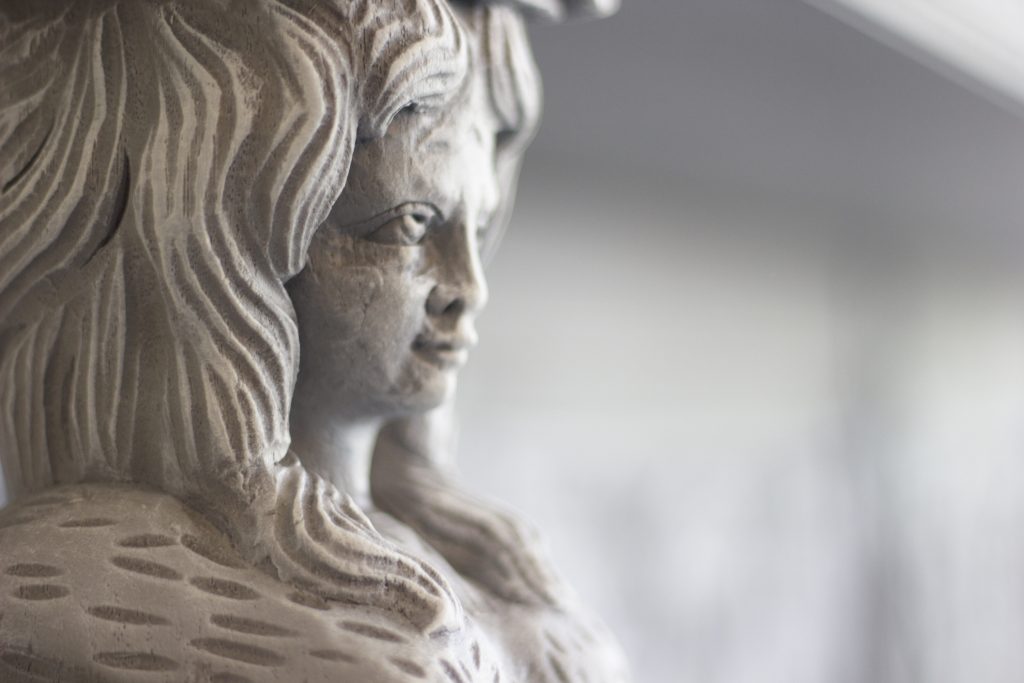
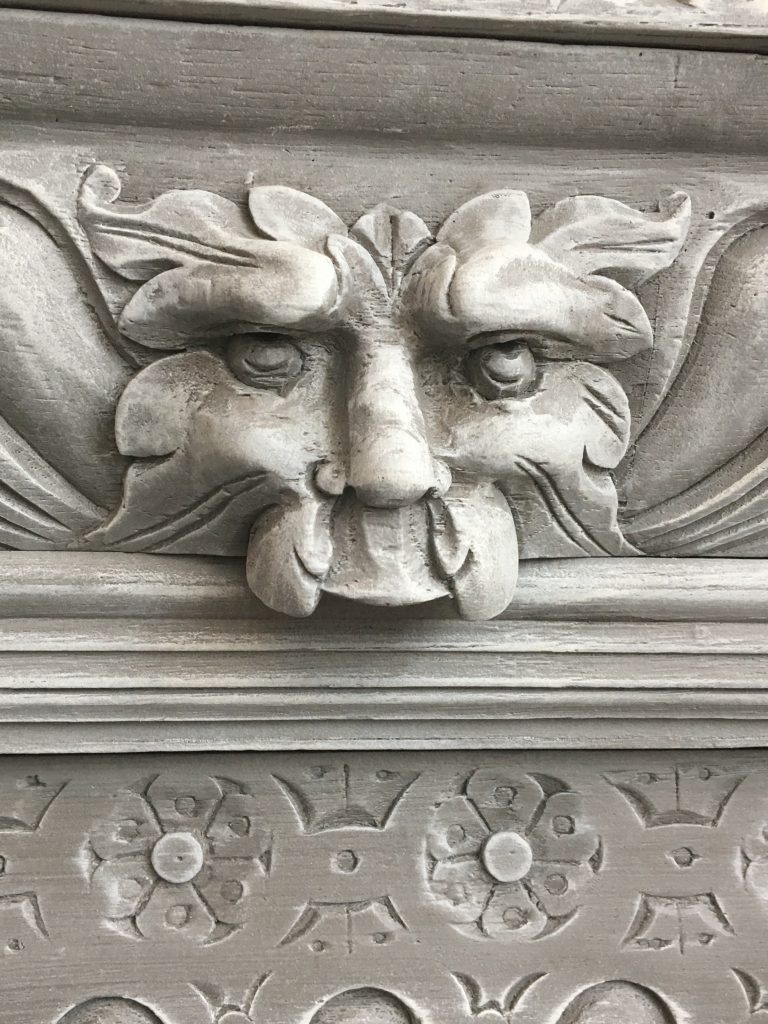
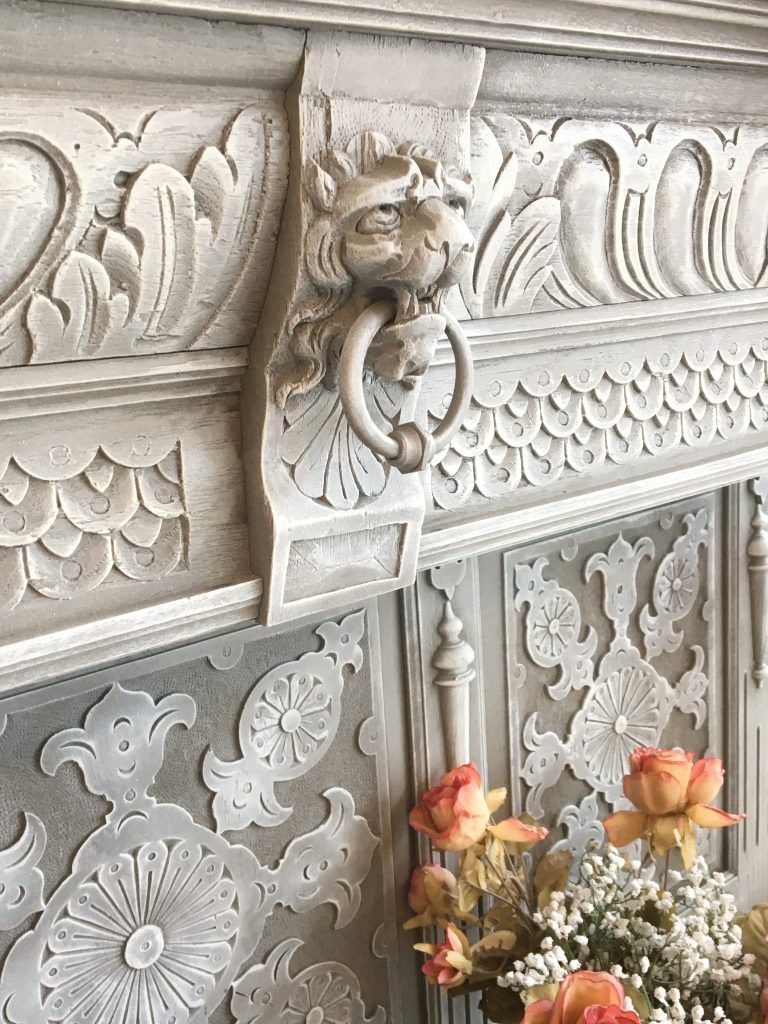
When the glaze was dry I got to work dry brushing Fusion’s Raw Silk over the entire carved areas and even used the very dry brush to lightly go over the flat surfaces to blend the whole piece together. I’m pleased with the results and think it works so well because of the balance of the mid-toned grey the dark black glaze and the light colour of the Raw Silk. It reminded me of makeup, when you contour and highlight, it’s essentially the same thing, the dark colour was used to deepen, draw back, and the light colour to highlight the prominent areas so to bring them forward. All these beauty shots taken by our fab friends Gemma Fox .
So what do you think? Leave a comment and let me know.
Sarah X


This makeover is testament to your talent Sarah! You’re right….it was truly ugly. But now it’s beautiful and I have no doubt someone will snap it up very quickly!
Ah Hayley, you made me blush x
I think to be honest anything would have made it look more attractive
Sarah x