
A filing cabinet makeover.
A guest blog post.
Hi Sarah here!
I have had such great feedback from the last guest blog post we are having a little run of them! I’m so pleased to be able to highlight some of the talent we have here in the UK and Laura Downes is no exception!
Laura’s business is Cherbubs Chalk Interiors, you should pop over to her Facebook Page a give her a like! Laura is currently renovating her home office space and has kindly shared this brilliant filing cabinet makeover.
Introducing Laura.

My filing cabinet transformation:
Let me give you a little backstory…
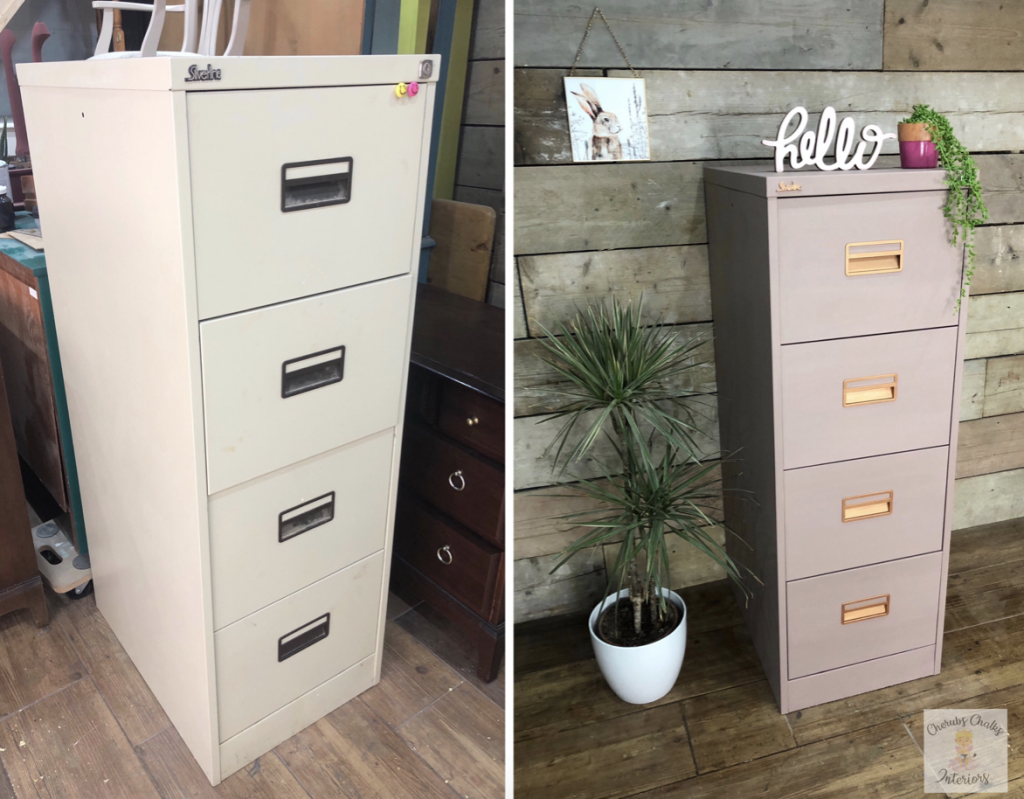
When I started my business, I soon realised that there are many rules and regulations to adhere to, including the all-important data protection. We must keep all documents containing customers details in a locked cabinet, so I started looking into lockable filing cabinets. I found that these can be expensive! And money can be tight in the early stages of building a business. There are a lot of outgoings, as you buy in materials, equipment, marketing etc and there is not so much money coming in! With this in mind, I started hunting for a second-hand filing cabinet, who knew this would be so difficult? The majority of them don’t lock, and the ones that do, don’t come with a key, as it has been lost long ago. Still, after a few weeks of looking, I snatched this one up for £20. Bargain! But boy is it ugly 😳
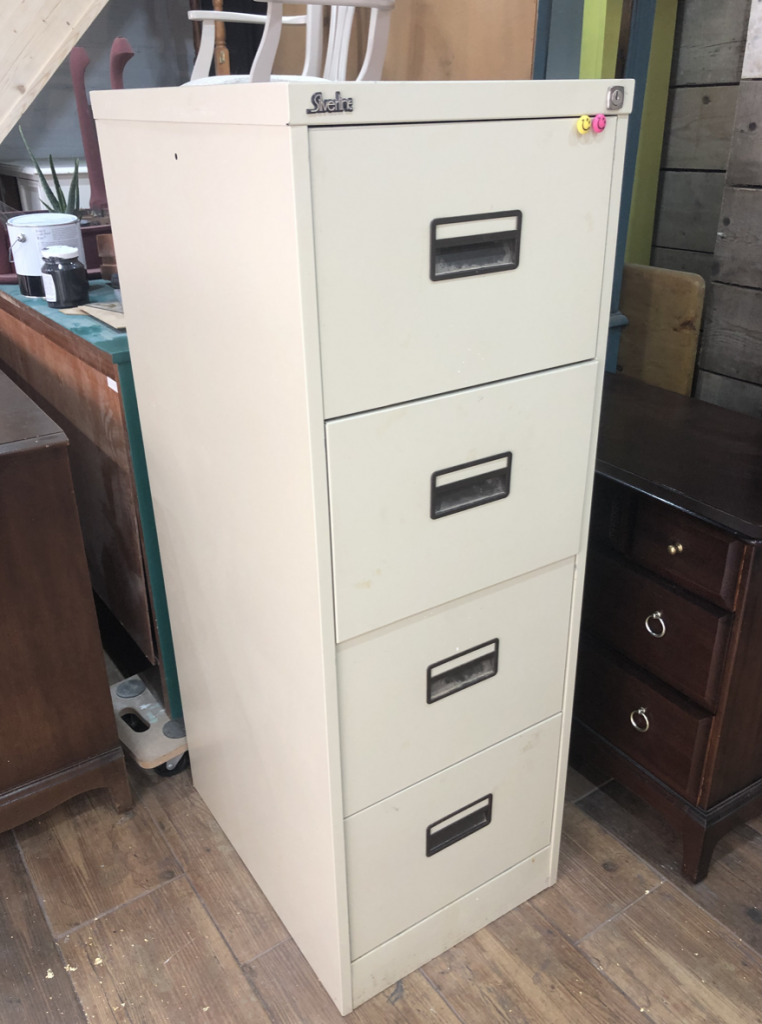
Luckily, painting things pretty is what I do, so here I will show you how this filing cabinet went from drab to fab, and now fits in with my office.
Looking for inspiration
I started off, not quite sure how I wanted my office to look. I admire so many different styles, and there are so many colours to choose from. Decision making isn’t always my strong point. So I headed over to Pinterest, seeking inspiration from others who had transformed their workspace into a homely, environment. Here, I was able to see what I did and didn’t like, decide what I wanted to include, and then I made a mood board.

I don’t know about you, but, paperwork isn’t my thing. It’s boring, complicated and I just struggle to find time for it. I’m a creative and I just want to be playing about getting my hands dirty. What I’m trying to say is, I find office work uninspiring and I do everything I can to avoid it, which means I leave everything to the last minute and then I turn into a total stress head, trying to get the invoices sent out, the finances to add up, and the tax return in on time. SO, the plan = to create a gorgeous cosy workspace to encourage me to spend time and actually enjoy this really important aspect of my business.
Choosing colours:
For a while now, I’ve been totally in love with Fusion Mineral Paint, it’s smooth, it’s creamy, it’s a dream to work with and it’s oh so durable. Their colours are just divine, but there are so many to choose from! I knew I wanted pink, but which pink? I grabbed the different shades I had to hand and started testing them out.
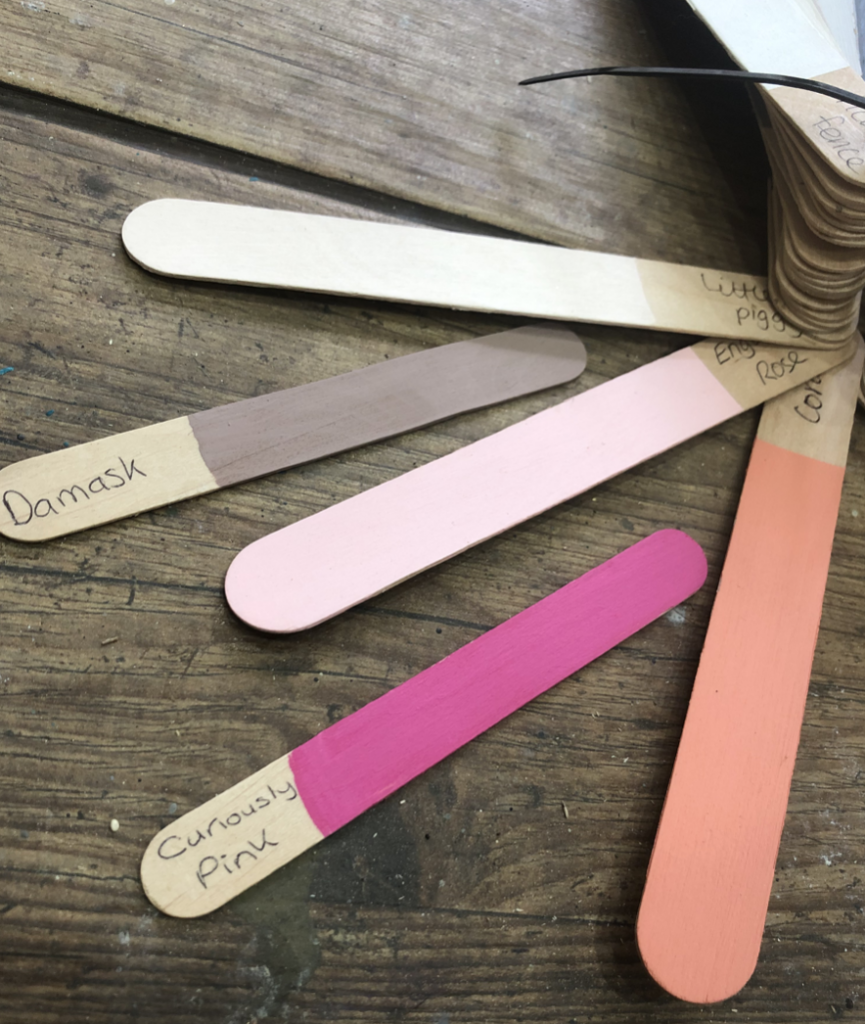
For my project, I chose Damask and Metallic Copper.
Prep:
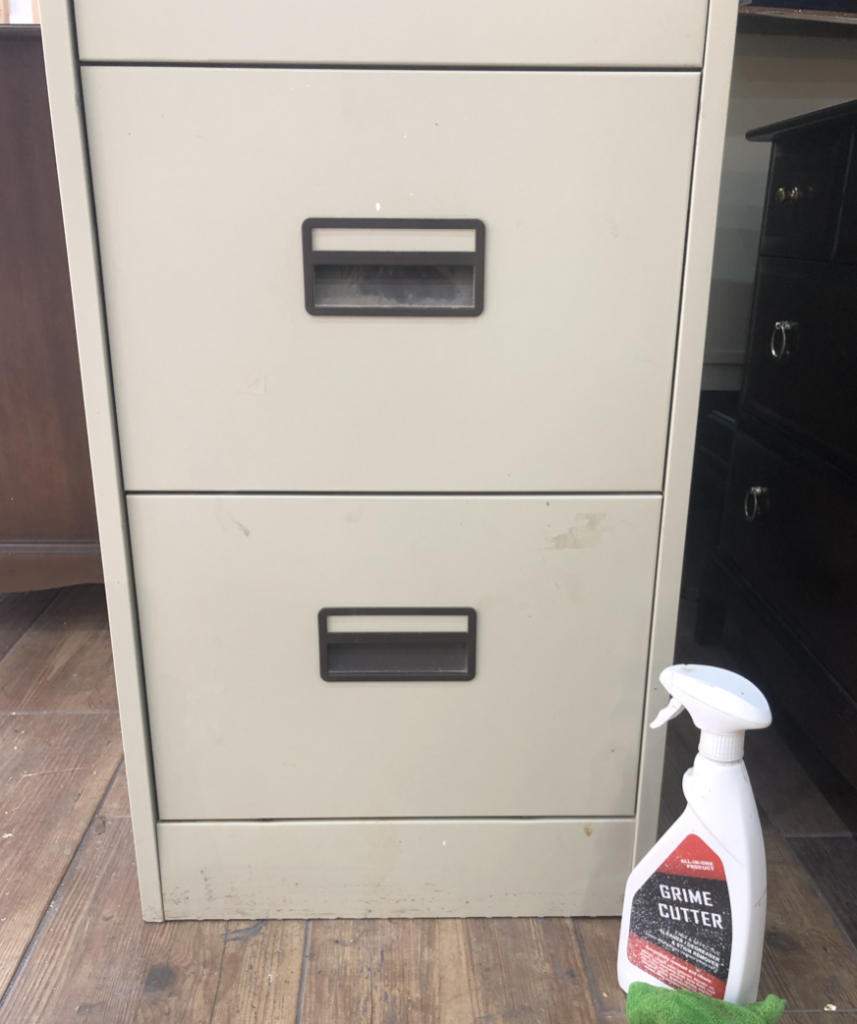
Your finish is only ever as good as your prep. Cleaning is always the first step. This is a second-hand piece, I don’t know where it has been, or what it endured before I got my hands on it. Now, it looked pretty clean, but don’t let that fool you. I’ve come across pieces that appear clean until you start scrubbing, and the cleaning cloth turns black. 🤢 I took all of the drawers out, and all of the hardware I could remove, to ensure I got into every single nook and cranny. I use grime cutter, spray it on, wipe with warm water, let dry and then wipe again with a wet cloth.
I’d never painted metal before, so this was something I wanted to research, to ensure a long-lasting finish. As metal is such a smooth, shiny, non-porous surface, it needs a bit of help and priming to make sure that the paint is going to stick. Fusion sells a product called Ultra Grip, by applying this to smooth surfaces, it gives the paint something to grab onto. I applied ultra grip all over, using a roller and a brush in the hard to reach areas, and let dry overnight. Always make sure to clean your brush as soon as you’ve finished, if you leave it to dry out you will find it very hard to bring the brush back to life.
Now for the exciting bit!
First I apply masking tape around the edges of the drawers, to ensure smooth clean lines. I don’t want any paint to run down the sides of the drawers.
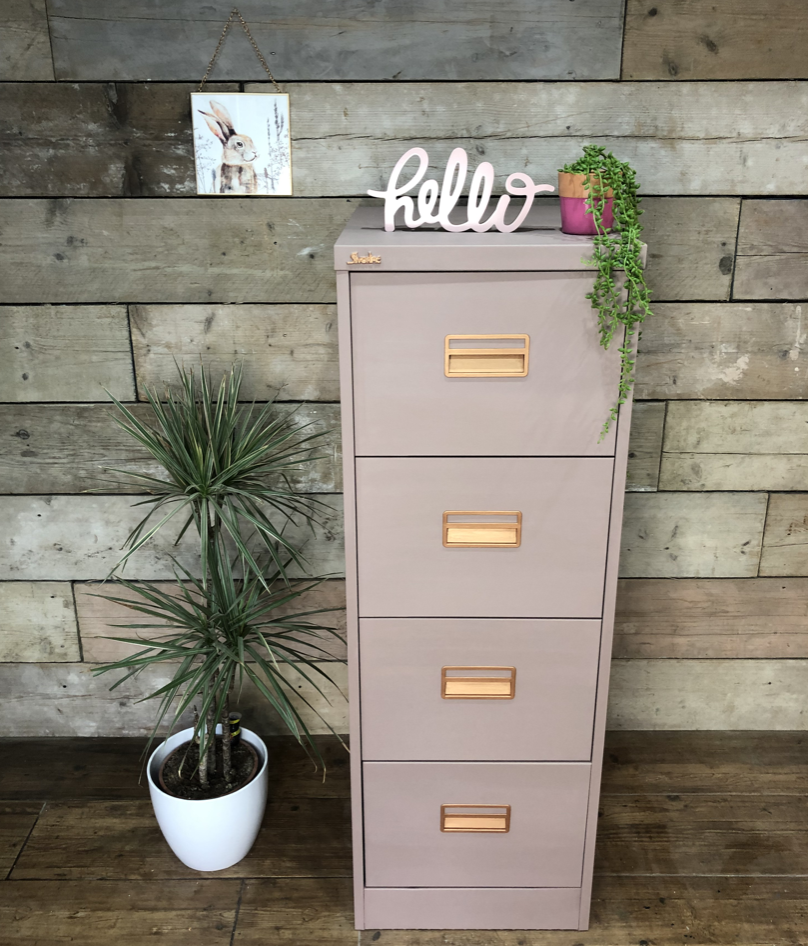
Once that’s done, I can start painting. I applied 2 coats of Damask, again using a roller and brush, leaving a few hours in between each coat. Then I painted the hardware copper. Once all was dry I fitted it all back together and TADAAAA! She’s ready to go back in my office.
Keep an eye on our Facebook page Cherubs Chalk Interiors for the next instalment. I’ll be painting my leather swivel chair to match!
Thanks for letting me share my project with you.
Laura X


How did you paint the hardware? Did it come off?
Laura used Fusions metallic paint, it works well on metal and it hasn’t come off so far.