How to layer Fusion Mineral Paint.
How to layer Fusion Mineral Paint.
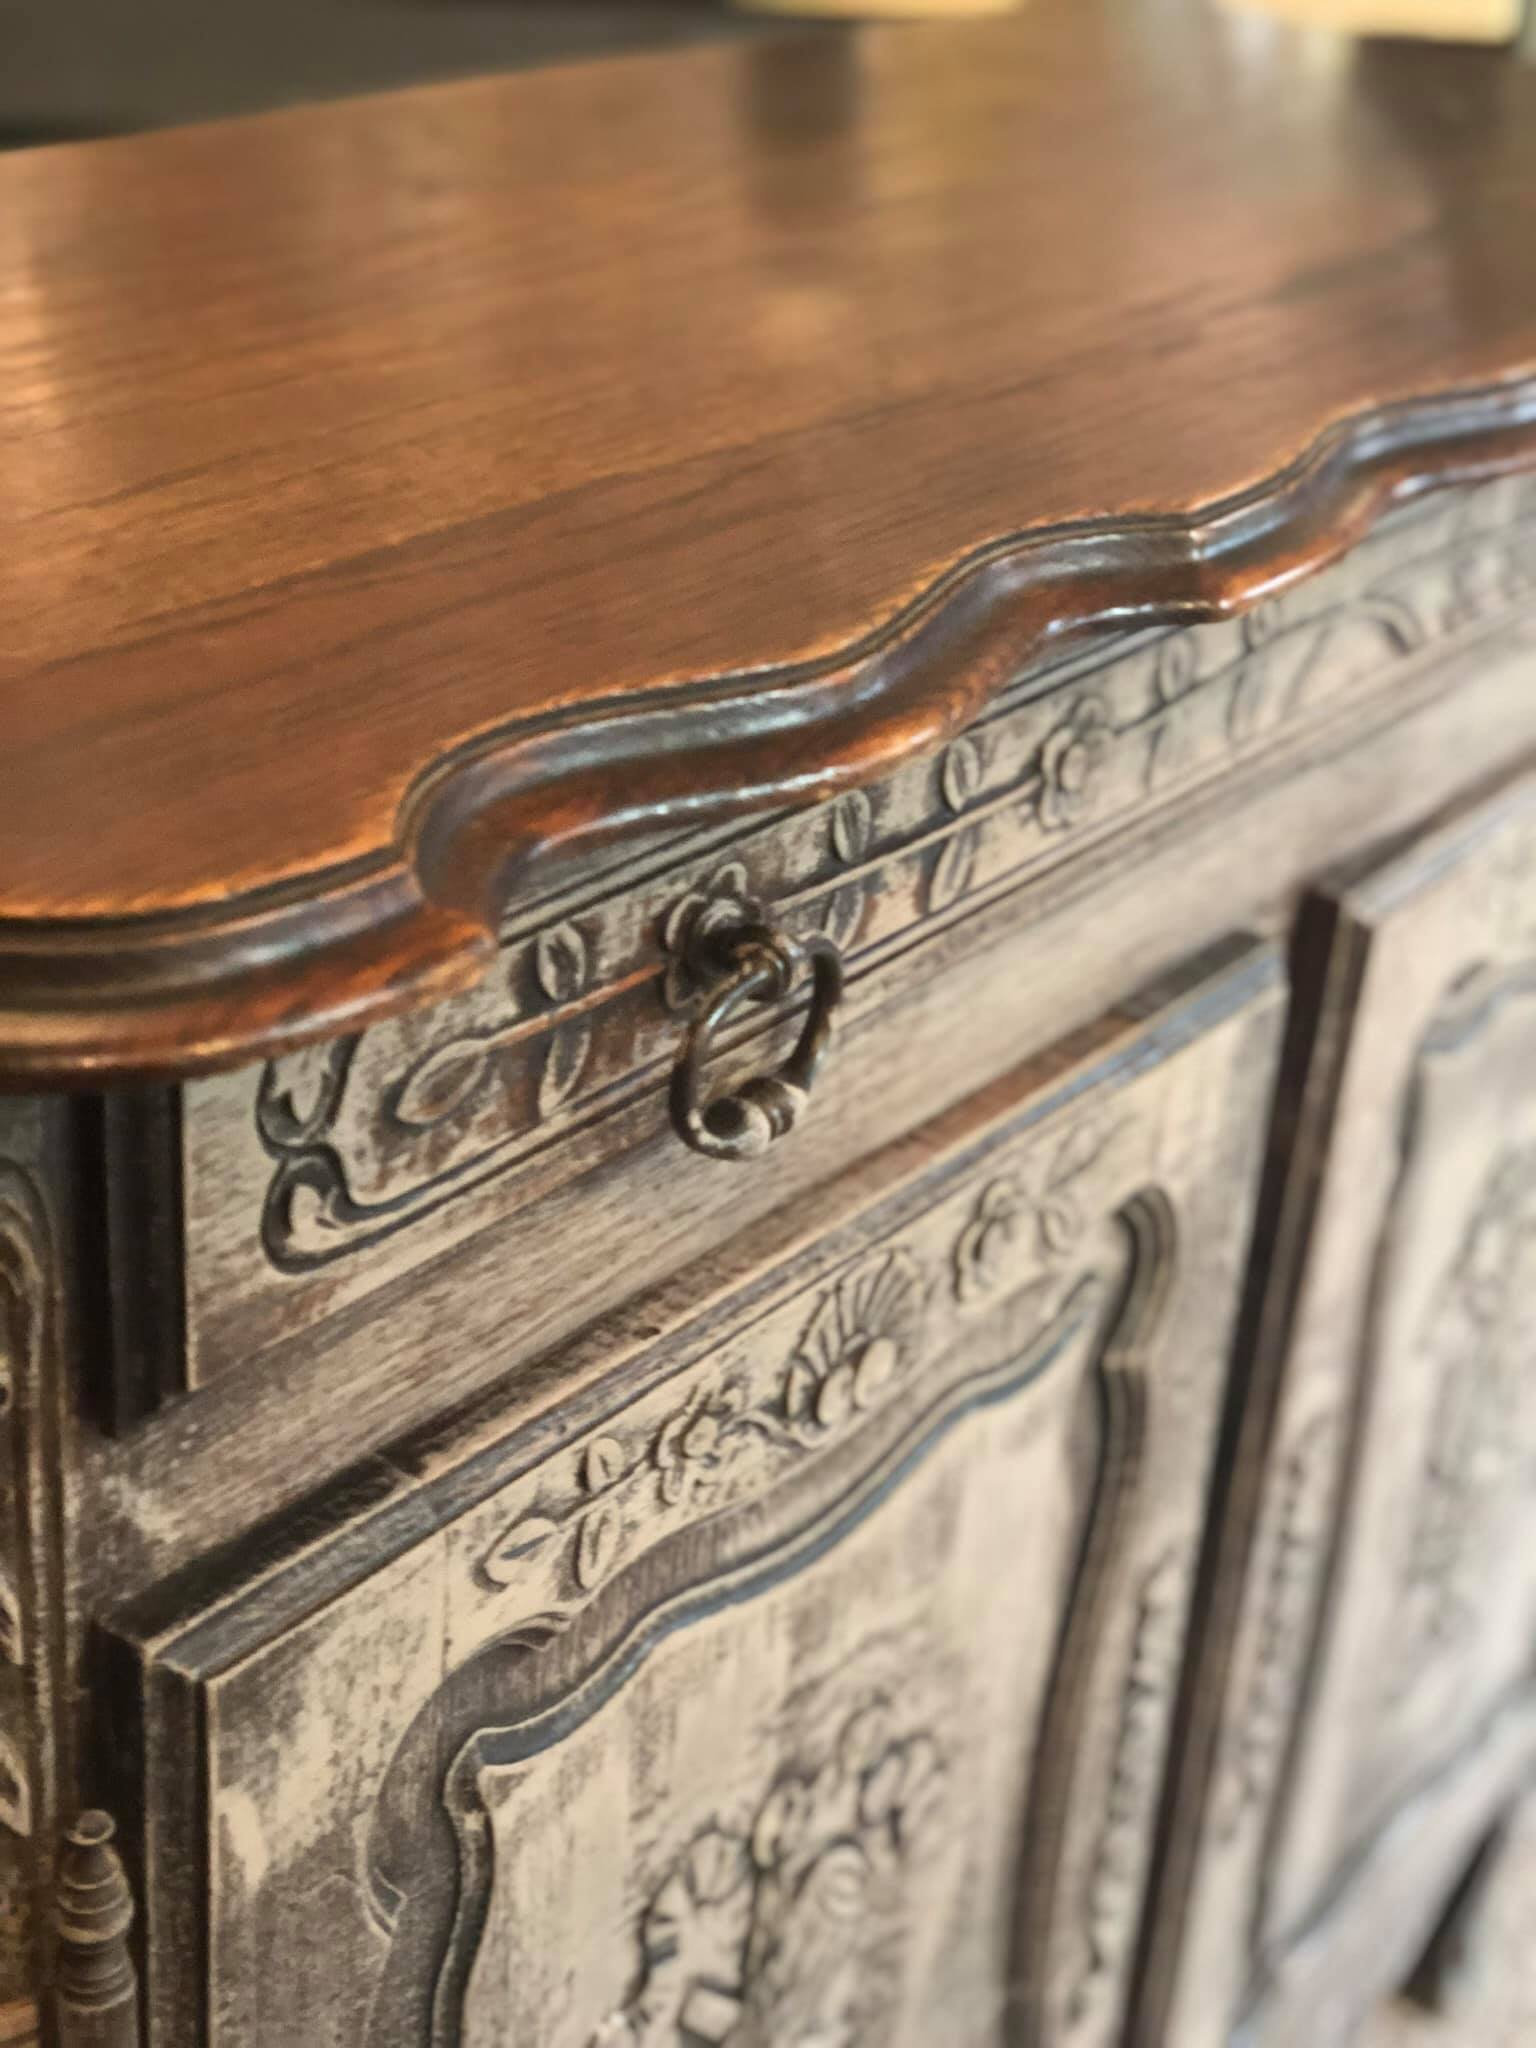
This piece was in good condition and very pretty with all its carvings. It’s Oak and my dealer got it from France where almost all my stock comes from! I know I’m very lucky to live this close to the coast, and we do get some gorgeous pieces in.
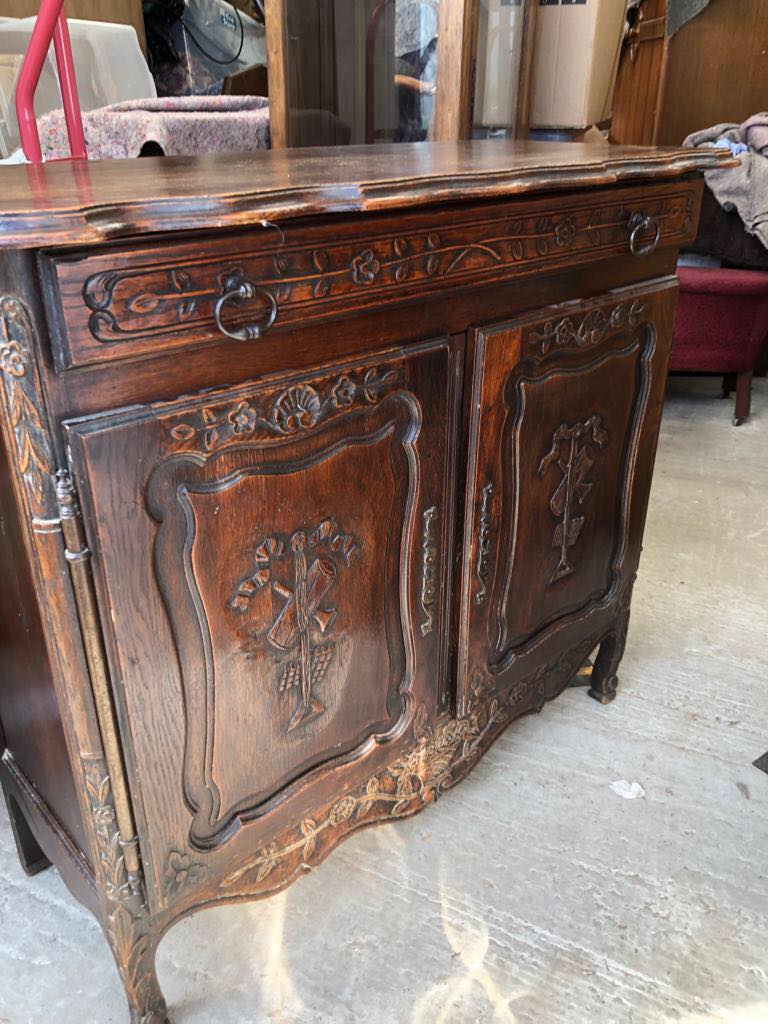
I started as I do with all my pieces by cleaning them with Fusion’s TSP it’s a concentrated solution and you only need 2 capfuls in a litre of water to get your furniture squeaky clean. Next up I gave it a light sand with a 220 grit Sandi Hand, just to give it a key. Keying the piece took all of 2 mins and the analogy I use for my customers is to use the sand paper like it’s a cloth and wipe the piece all over! that’s it … easy peasy.
Choosing a colour
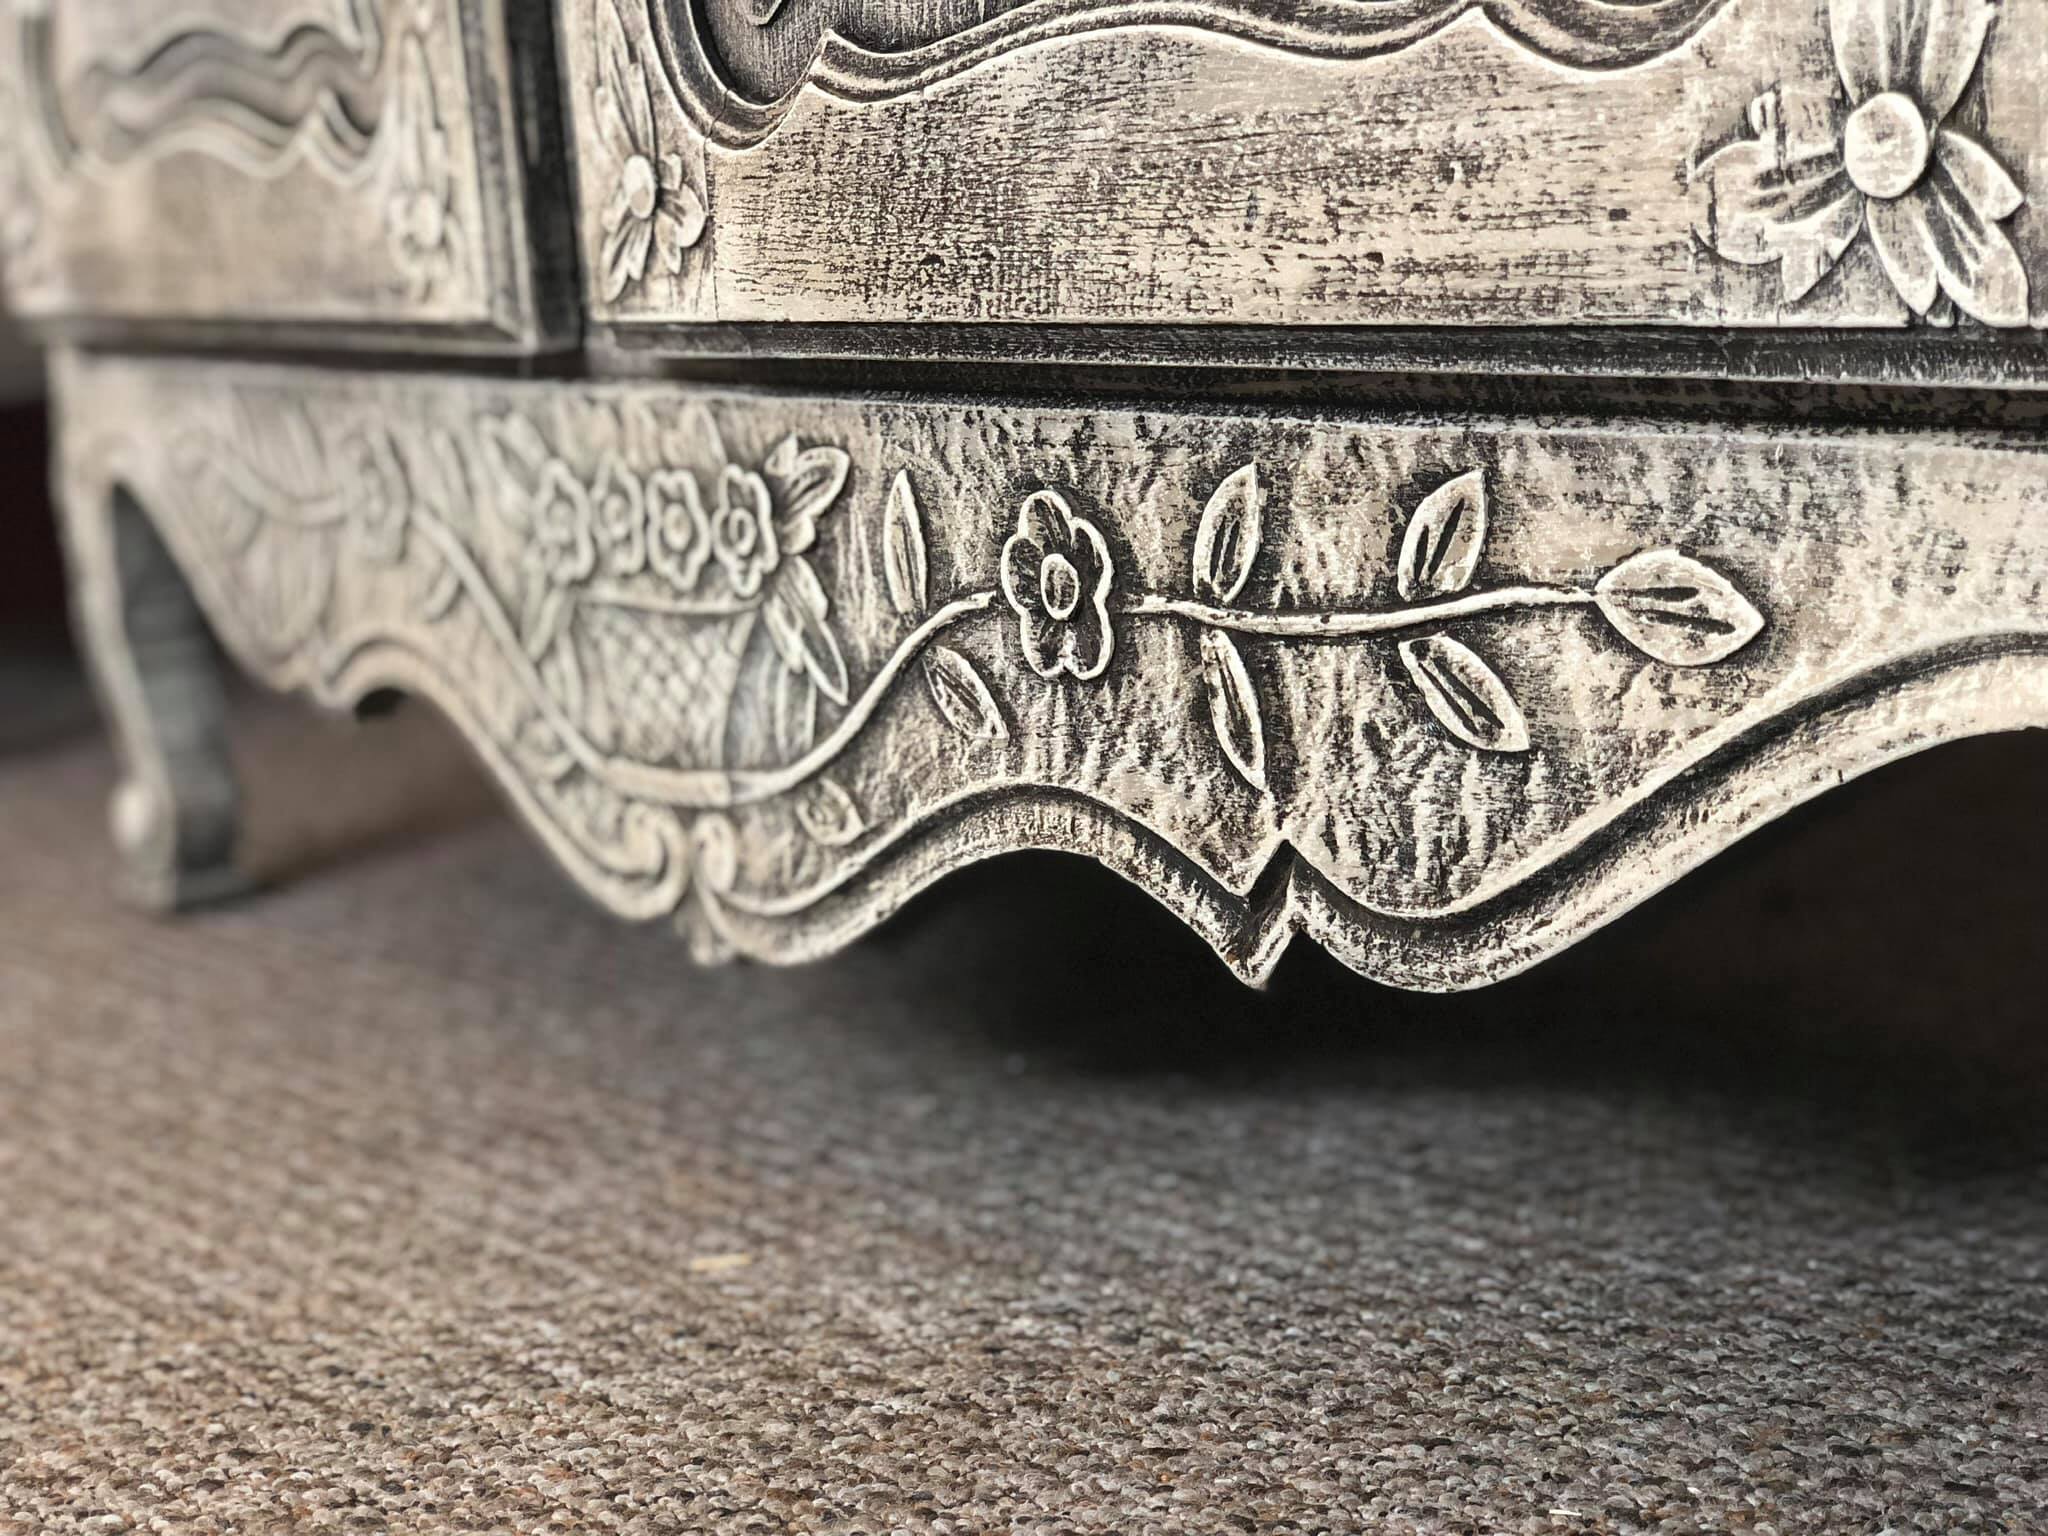
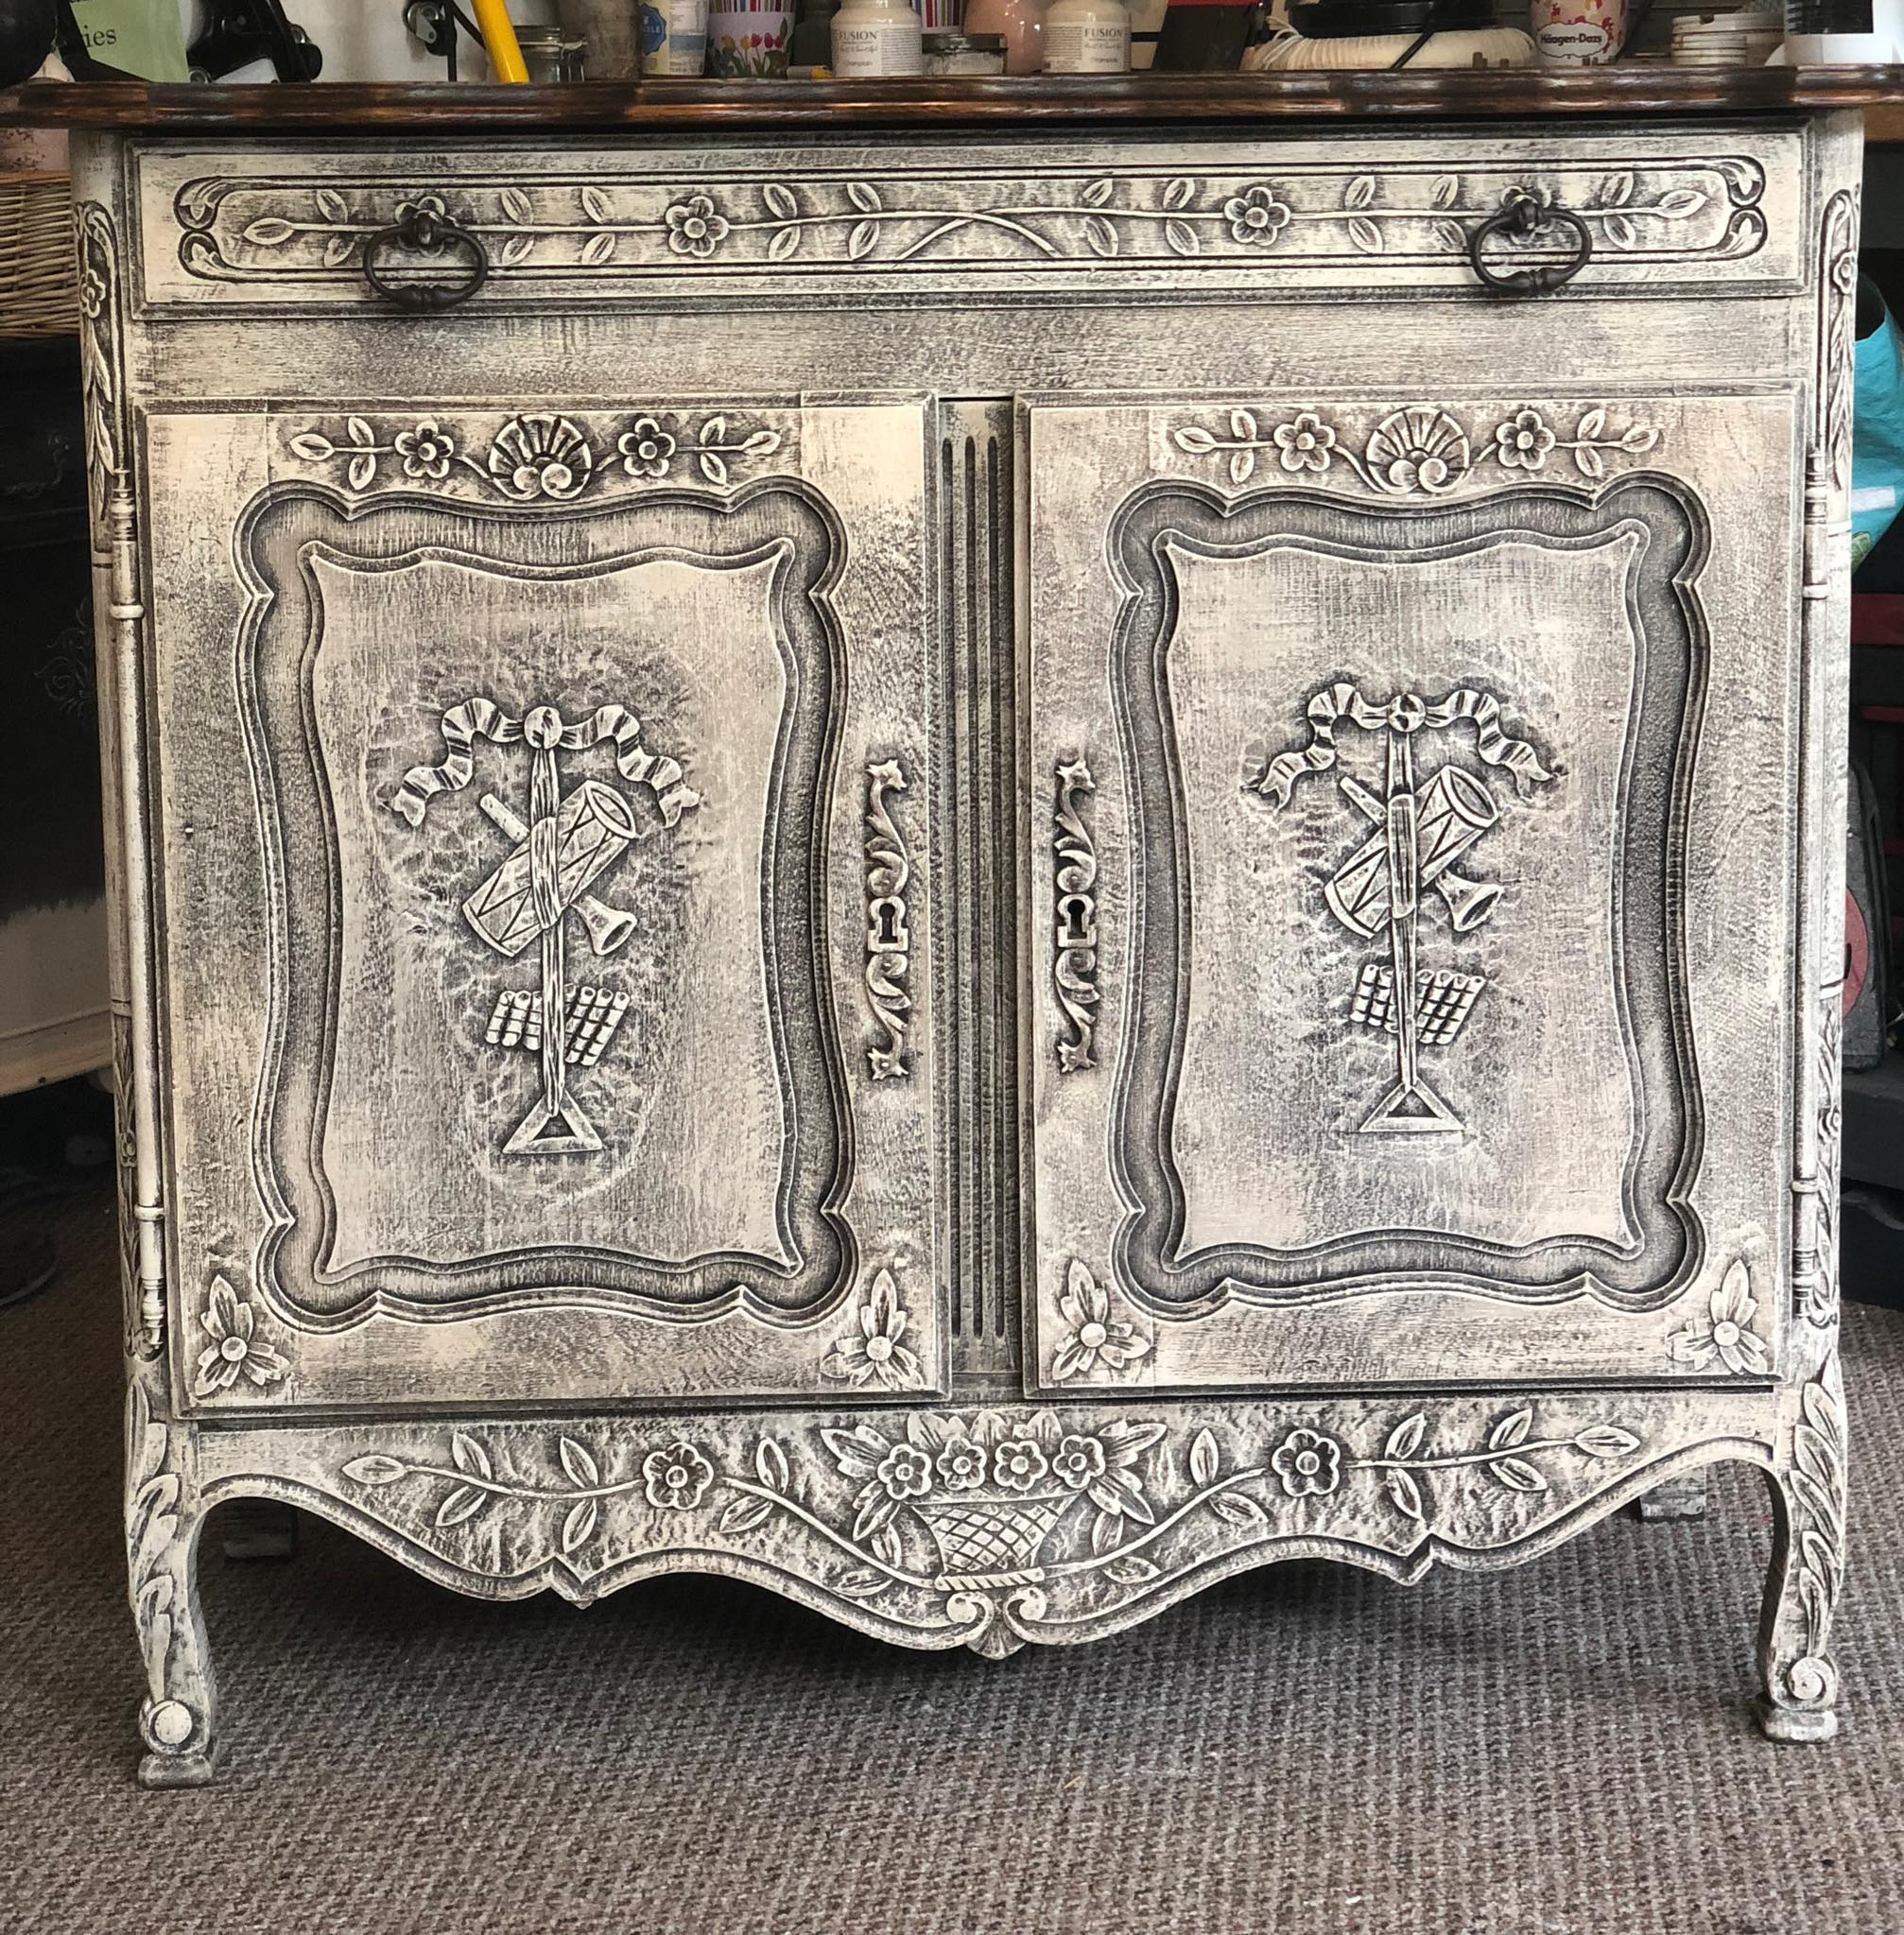
Lots of my painty friends always say how lucky I am to have the full Fusion Mineral Paint UK range to choose from but I’m telling you it makes it more difficult to choose! I wanted to keep the top in its original condition but the bottom needed lightening up. I ended up choosing Algonquin, Cathedral Taupe and Plaster. These 3 colours together are fab and I think they work really well, Plaster is a real favourite of mine.
Dry brush layering
This technique is simple, quick and uses very little paint, I use it a lot because it’s so versatile and goes great with lots of colour combos. I did a kitchen dresser in Algonquin, Champness and Putty a little while ago, you can read about that here. For this piece, I started with the Algonquin by using a dry brush ( almost ) all over and repeated this with Cathedral Taupe and Plaster. You are not looking for full coverage at all. It should just be on the large flat surfaces and you should still be able to see the dark wood through it. To get the right amount of paint on your brush I just load it up as normal and wipe it off on a cardboard square.
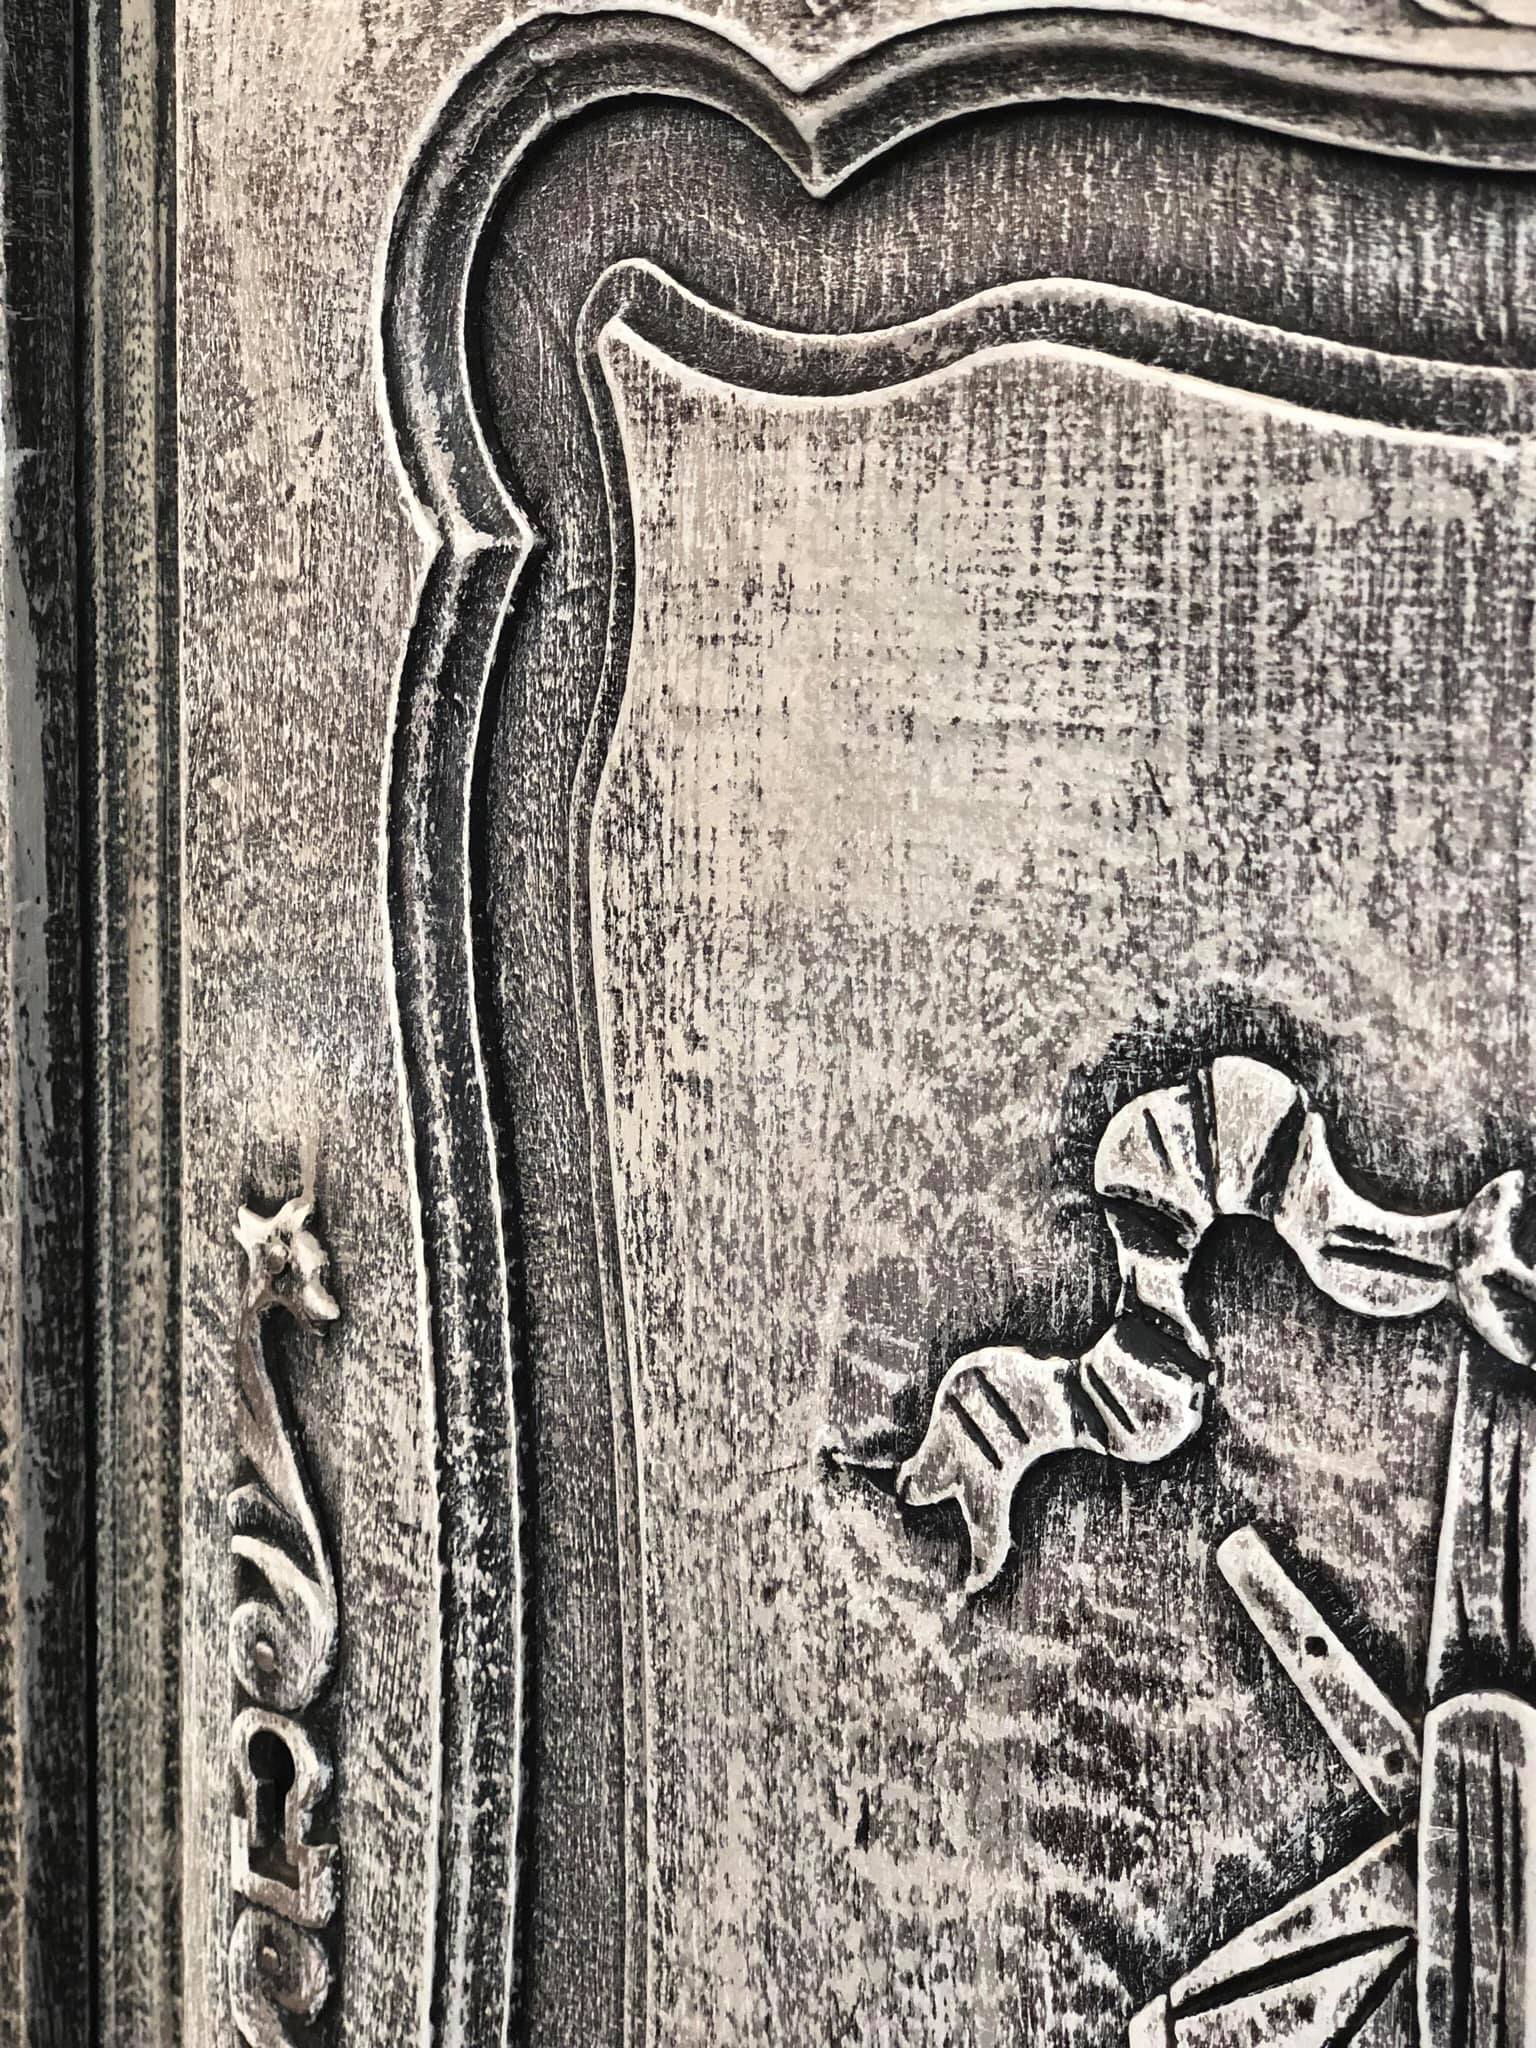
As you can see once you layer the dry brushing you get this really cool effect. The great advantage to doing it this way is all the antiquing is already done, or at least it looks that way. As I didn’t reach the crevices while I was dry brushing the paint hasn’t reached the recessed areas, keeping them the original dark colour. So simple to do.
Finishing
It looked pretty good as it was but I was going to wax the top to give it a bit of extra life so I added a small amount of Antiquing wax to the corners and crevices to give it some more age. The hardware was given a touch of Chocolate to maintain the dark iron colour that was already there and that’s it! I think all in all it took around 1hr to paint and maybe half hr to clean and prep and of course not much paint was used with this technique. A quick Makeover that looks interesting and unique.
What do you think? Is this a technique you would try?
Sarah X

Really interested in your technique. Just picked up a dresser that may work. I see that yours was already dark – mine is more honeycolored. Would you recommend painting the entire piece black and then trying your dry brush technique?
We never got a chance to chat but I was at the Fusion Retreat in October. We focus more on smaller items in our European import store…but I hope to do more furniture work and decorative wall techniques in the future with an emphasis on European esthetics.
Ah what a shame, maybe next time hey? I think the European vintage style is timeless.
Sarah X
Maybe just try using colours to compliment the honey toned wood. Greens look great with it
Sarah
x
Oh wow this is stunning Sarah x
Ah thank you Laura, I use it a lot this technique is simple and effective x